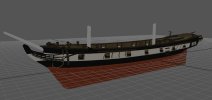
Back in business? Now that's what I like to see!

Yep, it looks like you got it right this time. All you need to do is make sure all the models are titled 'USS_Enterprise1_rey_x', and we're ready to move on.
Oh, you'll probably also need to add '_1' to the original 'USS_Enterprise1_rey_a1', and rename the original rey_a2 to rey_d2.
The next step involves using TOOL to take away the old yards and add the new ones. This will take a bit of trial and error, but you'll get the hang of it.
-- Please note: you must NOT minimise TOOL at any time, because that causes it to crash, for some strange reason. --
So, first you need to open USS_Enterprise1_mast2 in TOOL, and go to View -> Locators. Click 'locators' in the new window, and you'll see a list of locators (kinda obvious, I know

).
All you're interested in here is the top three locators in the 'geometry' group. You need to change rey_a1 to rey_a2, click 'Apply Changes', and in the main window click 'Save GM'.
Now, open mast2 in GM Viewer, and tick the boxes at the bottom of the screen which say 'Show labels' and 'Show locators'. Also, tick '3D Grid mode' next to those boxes.
Move the camera around the mast, and zoom in until you can see where 'rey_a2' appears. See the screenshot below, which also shows 'rey_b2' is visible. 'Rey_c2' is somewhere higher up the mast.
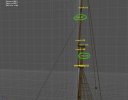
It's those three locators that need to be shifted along the Y and Z axes, to position the new yards as in the diagram I posted ages ago.
With TOOL still open, go back to the locators window, and adjust the PositionY and PositionZ values until you think they're about right.
Apply the changes and save the GM as before, and check your results in GM Viewer by clicking 'Reload GM'. Repeat this cycle until you think you've got the locators where you want them.
Let me know when you finish that step, or if you get stuck, and I'll show you how to do this for mast1 and 3.

