K
Keith
Guest
Retexturing Tutorial for PotC (Sea Dogs II), by Duke Surak'nar
Please visit this thread for additional Updates on the subject bellow
Hello All,
It is my wish with this tutorial to share knowledge or give hints on how you can retexture this wonderful game that we all Love in 8 easy steps.
Introduction
Before starting to Mod it is a good practice to evaluate needs, research content, get tools or information and establish a plan before you add your content. And I do say adding content instead of replacing it because it is the most practical way of doing things, since it not only preserves original content but it also `pro-actively` eliminates the danger of conflicts between mods made by different people.
1- Evaluate Needs:
This is a simple step of looking what you would like to offer as a Content Mod, as part of a Team Effort with other people that could do Code Moding or on an Individual basis.
So, is it a set of characters? Is it a Ship? A house or other items present in the game such as environment.
Is there a specific role or goal behind the content? A Nation Mod, a Realism Mod, Fantasy Mod, Historical Mod or Personal taste and imagination Mod?
Based on the answers of those questions you can then proceed to the next step.
2- Research Content:
This is the step of gathering information based on the above answers. For instance, if you are going for a Historical Mod, it would be nice that you do some research on Books or the Web for Pictures or Drawings, that way you can make your Mod as accurate as possible.
Examples:
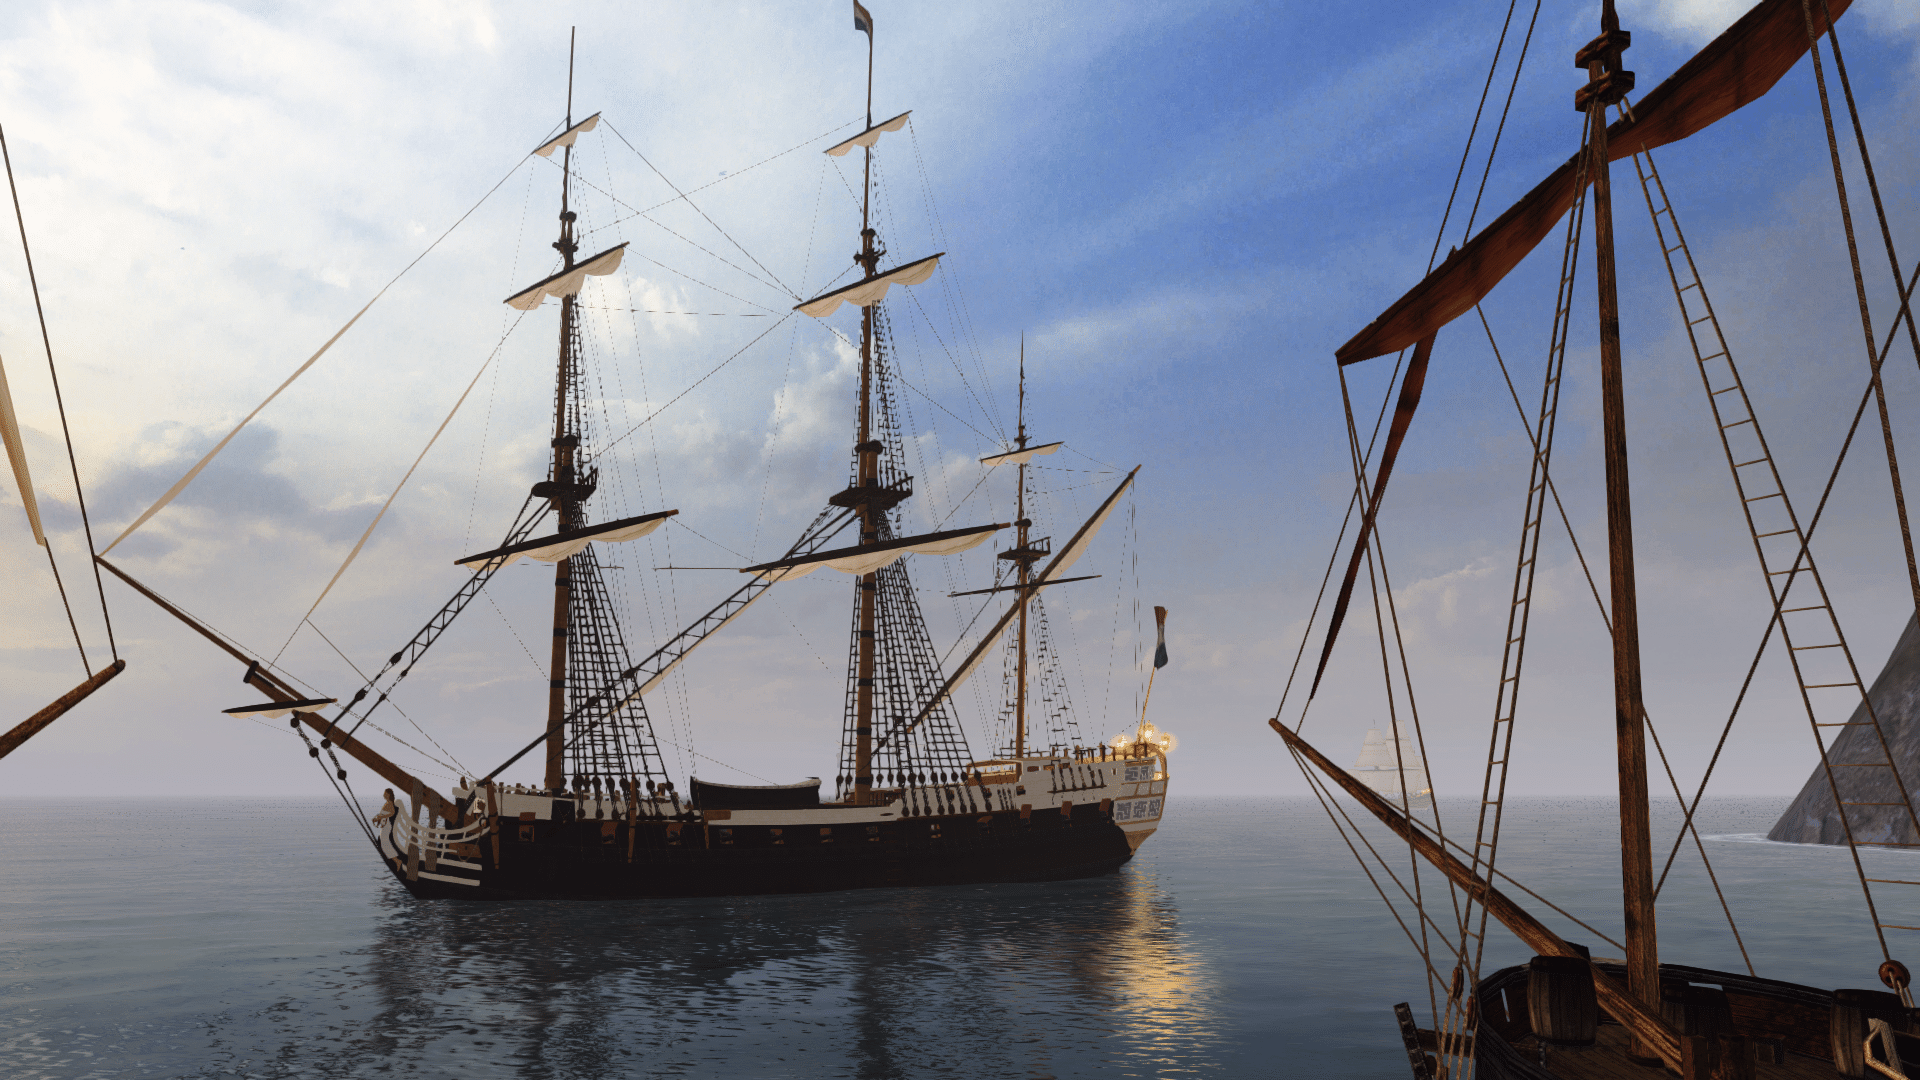
The Xebec Barbarossa - It is a Personal Taste and Imagination Mod
The French Soldiers - It is a Historical/Realism Mod
Sources from various Historical and Historical Reconstitution Websites.


Retextured Model (Uniforms back in those times were everything BUT uniform, and each different regiment had its own colors, so I tried to strike a balance between the shades of Grey, Yellow/Beige and Cyan/Blue)


(And I do say as possible because there are always some limitations, since we are not texturing directly the models and we are modifying the `pre-existing` textures.)
3- Get tools and Information:
This step is about reading this tutorial for instance. It is about getting relevant information on Moding the game of your choosing. Usually you can find that Information and/or Tools from either the Game Developer's websites or forums of the community's web sites. It is also about information of file formats and software to use, graphics packages to make your mods.
4- Establish a plan:
This is the final step before actually starting to mod the new content. It is a very simple step of gathering all the above information and tracing your workflow.
As we all know, moding is a Hobby for many and a past time for others, at least it is a temporary enjoyment. But it certainly is not a full time job, and so it depends on our real life obligations. Some people have lots of free time on their hands, some others have only a couple of hours to spare per day, (Work, family, vacations school etc...) so in this step you evaluate those factors depending if you are doing a mod with others or a mod by yourself. If others are concerned take care to have means of communication and inform everyone of your schedule and get theirs. At least that way everyone knows appreciatively how long it may take you to do some things and vice versa.
Let's Get Started!
In what follows I am going to concentrate on step - 3 - and in giving out the technique to use in order to mod the 2D graphics of this game.
The Tools!
Graphics Editor:
You will need some kind of 2D Graphic's Editor to do this.
Examples can be: Paint Shop Pro, Photoshop, GIMP, and any other Graphics software capable of editing (.DDS) or (.TGA) files.
Rexman's Tools:
You will also need Rexman's (.TX) Conversion tools, because the game uses that format, which is a DXT type of compression. The original uncompressed files are made in the (.TGA) format.
Those can be found here: http://rex3d.com/potc/
So initially, those were (.TGA) then compressed to (.DDS) and their header changed to (.TX)
Rexman's tools will change the Header from (.TX) to (.DDS), that means that the file is still compressed as (.DDS), at this point you have two choices:
a- Use a .dds `plug-in`.
b- Use the DTX tools to uncompress the texture to .tga format.
Both the Photoshop `plug-in` and the DXT tools can be found here: (there is now GIMP `plug-in`)
http://developer.nvidia.com/object/ps_text...sion_plugin.htm
Note: If you use Paint Shop Pro, you will have to find the previous DXT compression `Plug-in` as this latest one will only work with Photoshop.
If you install the `plug-in` then make sure to download the required DLL files as well.
The Hex Editor:
Yes, you will need one of those too, and you can find many free Hex editors in the Web. I have found over time that many people kind of shiver at the thought of a Hex Editor. Actually, it is a very simple step in the retexturing process. And besides, you can always say "I hex edited those textures in to the Model", how cool can that sound!
So how do we proceed?
The Process
Step 1
I will use the Xebec Barbarossa as an example of the retexturing, and the process is the same for Characters and any other Object of the game.
The Model,
The Xebec Barbarossa is of course a retextured model based on - the Xebec!
So I went in to the RESOURCEMODELSSHIPS folder and Copy Pasted the XEBEC1 folder and renamed it XEBEC3.
Then, you would have to Open that Folder and rename all the files from xebec1.gm to xebec3.gm
Step 2
Now that we have our model we need to identify which textures it uses, obviously it would use some texture under RESOURCETEXTURESSHIPS folder that has Xebec1 in its file name. But some models use multiple textures and it is important to know which textures they really use.
So, fire up your Hex Editor (Yeah!), and open the xebec1.gm model.
In the beginning all that may look weird to you, if you never used a Hex editor before.
But basically most Hex Editors would show the information in 2 Columns. On the left side we have Hexadecimal Addresses, and that left side is usually the widest. On the right side there is a column made up usually of characters and some of them are readable.
So that right side is what interests us and we need to scroll down looking for any references to .tga (alternatively you can search or find from the Menu, and depending the software you use).
Like so:

we find deck.tga
and:

we find bourtoutxebec1.tga
Step 3
Now that we know what the textures are we can start converting them by copying them from the RESOURCETEXTURESSHIPS folder in to our "Working Folder" (which is usually a folder of your choice outside of the game folder so that we don't accidentally overwrite game files and it is easier to find.
Use Rexman's files to convert from .tga.tx to .tga.tx.dds and then either open the .dds file with your Graphics software or use nvdtx.exe included the DXTC tools Bundle to convert to .tga and edit in your favorite Graphics Software.
Step 4
Make your desired Modifications to the textures. As you will see POTC uses a 1 files texturing technique (more modern) where different elements of a Model are placed on top of different parts of 1 or 2 textures.
In Sea Dogs it was a different texturing technique, where each element of a model had a different texture file.
So in Sea Dogs it was not very difficult to Identify which texture file went where. In POTC it can be a little bit trickier but it sure does help to have fewer files to deal with
IMPORTANT NOTE -----------------------------------------------------------------------
Saving your textures is once of the most important things.
Since POTC uses the more modern 1 file has it all texturing approach, different models share same texture files. So if you modify a texture and keep it with the same name (ie deck.tga.tx) that texture is used by ALL ships in the game. So you will be changing all the ships at the same time!
The solution is to have a new file, hence the adding content part.
This solution however poses another problem. The Models themselves refer to the original texture file, so even if you save it something different it will not be used by the Xebec3.gm
Experience, exploration and ingenuity have given us a solution to that problem too.
And the solution is to change the texture files names in the Model. If your Moding is only for yourself that is never a problem. If you intend on distributing your mods however, you will have to take some care because sooner or later there is bound to be file name conflicts with other moders.
But, there is a solution to that problem too, and was incepted at the LIB SD MOD forum by myself and some of my fellow moders and friends.
We call it the "Moders Code", and it consists of choosing a 2 digit number that represents you and is included in your moded filenames.
If you have downloaded the Xebec Barbarossa you will see that the texture filenames all contain the number "08", this is my number, (Duke Surak'nar - 08), it would therefore be a good habit to save your files with something that everyone agrees upon.
But what number to choose?
Well, I would cordially ask for the cooperation of the administrators of this website to maintain a list of Moders and their chosen Codes, in a first come first served basis.
Maybe that list could start as a reply to this thread.
So far however the lists looks like this:
01 - Available
...
03 - Kodo_Boon
...
08 - Duke Surak'nar
...
12 - Verruckt
...
...
66 - Le Diable
...
...
69 - Draksen
...
...
89 - Clutch Marauder
...
...
99 - Available.
This is a list between 01 and 99, the code 00 is reserved, for file troubleshooting.
The choice to have such a code if you are or intend to become a Graphics Moder is really yours, but if you want to avoid answering threads like :
"New Ship File Problem", "This Character Mode does not work with that Mod" etc, it is the simplest solution to follow.
And it does help also people who make installers by reducing the time it takes for them to troubleshoot file conflicts.
(God only knows how many such hours Hosehead spent in the Sea Dogs `Add-on` Installer)
END OF NOTE ---------------------------------------------------------------------------------
Step 5
So once we are happy with our modifications we save our files.
In this case:
bortoutxebec1.tga was saved as bortout08xbs1.tga
and,
deck.tga was saved as 08xb.tga
IMPORTANT: Notice how the number of letters is the same length in both cases. That is important due to the fact that once the textures are replaced in the model their length cannot be changed. So we have to keep same length of filenames.
It is also why at some point there is bound to be filename conflicts but having 2 unique digits insures that there is not such conflict.
Step 6
Reconvert the textures back to the Game format.
If you are using a `plug-in` and directly modify the .dds file then use Rexman's tools to reconvert them back to .tx
If you are modifying .tga then you would need to convert or rather compress them back to .dds.
NOTE: once converted to .dds you will have to rename the file to filename.tga.tx.dds so that Rexman's tools can put it back to .tx correctly.
Step 7
In this step, we will be launching the Hex Editor (again).
So this operation consists of changing the names of the textures in the model to match our texture files.
Reminder: Keep same length of file names otherwise you the model will be corrupted.
So find the deck.tga and change it to match your file.
In this case: deck.tga changes to 08xb.tga
Note: You don't really need to change the complete name, but only add your code, however, if you intend on doing multiple mods you will need different filenames aswell to not conflict with your previous Mod.
Step 8
Copy the files to the appropriate places and make the appropriate code changes in the Ships_init.c and ships.h files and everywhere else needed depending on what you are retexturing.
And your Mod is now ready for your pleasure or for distribution
SPECIAL THANKS:
Rexman for discovering the compression standard used in PotC and making the tools.
Enjoy!
Please visit this thread for additional Updates on the subject bellow
Hello All,
It is my wish with this tutorial to share knowledge or give hints on how you can retexture this wonderful game that we all Love in 8 easy steps.
Introduction
Before starting to Mod it is a good practice to evaluate needs, research content, get tools or information and establish a plan before you add your content. And I do say adding content instead of replacing it because it is the most practical way of doing things, since it not only preserves original content but it also `pro-actively` eliminates the danger of conflicts between mods made by different people.
1- Evaluate Needs:
This is a simple step of looking what you would like to offer as a Content Mod, as part of a Team Effort with other people that could do Code Moding or on an Individual basis.
So, is it a set of characters? Is it a Ship? A house or other items present in the game such as environment.
Is there a specific role or goal behind the content? A Nation Mod, a Realism Mod, Fantasy Mod, Historical Mod or Personal taste and imagination Mod?
Based on the answers of those questions you can then proceed to the next step.
2- Research Content:
This is the step of gathering information based on the above answers. For instance, if you are going for a Historical Mod, it would be nice that you do some research on Books or the Web for Pictures or Drawings, that way you can make your Mod as accurate as possible.
Examples:
The Xebec Barbarossa - It is a Personal Taste and Imagination Mod
The French Soldiers - It is a Historical/Realism Mod
Sources from various Historical and Historical Reconstitution Websites.


Retextured Model (Uniforms back in those times were everything BUT uniform, and each different regiment had its own colors, so I tried to strike a balance between the shades of Grey, Yellow/Beige and Cyan/Blue)


(And I do say as possible because there are always some limitations, since we are not texturing directly the models and we are modifying the `pre-existing` textures.)
3- Get tools and Information:
This step is about reading this tutorial for instance. It is about getting relevant information on Moding the game of your choosing. Usually you can find that Information and/or Tools from either the Game Developer's websites or forums of the community's web sites. It is also about information of file formats and software to use, graphics packages to make your mods.
4- Establish a plan:
This is the final step before actually starting to mod the new content. It is a very simple step of gathering all the above information and tracing your workflow.
As we all know, moding is a Hobby for many and a past time for others, at least it is a temporary enjoyment. But it certainly is not a full time job, and so it depends on our real life obligations. Some people have lots of free time on their hands, some others have only a couple of hours to spare per day, (Work, family, vacations school etc...) so in this step you evaluate those factors depending if you are doing a mod with others or a mod by yourself. If others are concerned take care to have means of communication and inform everyone of your schedule and get theirs. At least that way everyone knows appreciatively how long it may take you to do some things and vice versa.
Let's Get Started!
In what follows I am going to concentrate on step - 3 - and in giving out the technique to use in order to mod the 2D graphics of this game.
The Tools!
Graphics Editor:
You will need some kind of 2D Graphic's Editor to do this.
Examples can be: Paint Shop Pro, Photoshop, GIMP, and any other Graphics software capable of editing (.DDS) or (.TGA) files.
Rexman's Tools:
You will also need Rexman's (.TX) Conversion tools, because the game uses that format, which is a DXT type of compression. The original uncompressed files are made in the (.TGA) format.
Those can be found here: http://rex3d.com/potc/
So initially, those were (.TGA) then compressed to (.DDS) and their header changed to (.TX)
Rexman's tools will change the Header from (.TX) to (.DDS), that means that the file is still compressed as (.DDS), at this point you have two choices:
a- Use a .dds `plug-in`.
b- Use the DTX tools to uncompress the texture to .tga format.
Both the Photoshop `plug-in` and the DXT tools can be found here: (there is now GIMP `plug-in`)
http://developer.nvidia.com/object/ps_text...sion_plugin.htm
Note: If you use Paint Shop Pro, you will have to find the previous DXT compression `Plug-in` as this latest one will only work with Photoshop.
If you install the `plug-in` then make sure to download the required DLL files as well.
The Hex Editor:
Yes, you will need one of those too, and you can find many free Hex editors in the Web. I have found over time that many people kind of shiver at the thought of a Hex Editor. Actually, it is a very simple step in the retexturing process. And besides, you can always say "I hex edited those textures in to the Model", how cool can that sound!
So how do we proceed?
The Process
Step 1
I will use the Xebec Barbarossa as an example of the retexturing, and the process is the same for Characters and any other Object of the game.
The Model,
The Xebec Barbarossa is of course a retextured model based on - the Xebec!
So I went in to the RESOURCEMODELSSHIPS folder and Copy Pasted the XEBEC1 folder and renamed it XEBEC3.
Then, you would have to Open that Folder and rename all the files from xebec1.gm to xebec3.gm
Step 2
Now that we have our model we need to identify which textures it uses, obviously it would use some texture under RESOURCETEXTURESSHIPS folder that has Xebec1 in its file name. But some models use multiple textures and it is important to know which textures they really use.
So, fire up your Hex Editor (Yeah!), and open the xebec1.gm model.
In the beginning all that may look weird to you, if you never used a Hex editor before.
But basically most Hex Editors would show the information in 2 Columns. On the left side we have Hexadecimal Addresses, and that left side is usually the widest. On the right side there is a column made up usually of characters and some of them are readable.
So that right side is what interests us and we need to scroll down looking for any references to .tga (alternatively you can search or find from the Menu, and depending the software you use).
Like so:

we find deck.tga
and:

we find bourtoutxebec1.tga
Step 3
Now that we know what the textures are we can start converting them by copying them from the RESOURCETEXTURESSHIPS folder in to our "Working Folder" (which is usually a folder of your choice outside of the game folder so that we don't accidentally overwrite game files and it is easier to find.
Use Rexman's files to convert from .tga.tx to .tga.tx.dds and then either open the .dds file with your Graphics software or use nvdtx.exe included the DXTC tools Bundle to convert to .tga and edit in your favorite Graphics Software.
Step 4
Make your desired Modifications to the textures. As you will see POTC uses a 1 files texturing technique (more modern) where different elements of a Model are placed on top of different parts of 1 or 2 textures.
In Sea Dogs it was a different texturing technique, where each element of a model had a different texture file.
So in Sea Dogs it was not very difficult to Identify which texture file went where. In POTC it can be a little bit trickier but it sure does help to have fewer files to deal with
IMPORTANT NOTE -----------------------------------------------------------------------
Saving your textures is once of the most important things.
Since POTC uses the more modern 1 file has it all texturing approach, different models share same texture files. So if you modify a texture and keep it with the same name (ie deck.tga.tx) that texture is used by ALL ships in the game. So you will be changing all the ships at the same time!
The solution is to have a new file, hence the adding content part.
This solution however poses another problem. The Models themselves refer to the original texture file, so even if you save it something different it will not be used by the Xebec3.gm
Experience, exploration and ingenuity have given us a solution to that problem too.
And the solution is to change the texture files names in the Model. If your Moding is only for yourself that is never a problem. If you intend on distributing your mods however, you will have to take some care because sooner or later there is bound to be file name conflicts with other moders.
But, there is a solution to that problem too, and was incepted at the LIB SD MOD forum by myself and some of my fellow moders and friends.
We call it the "Moders Code", and it consists of choosing a 2 digit number that represents you and is included in your moded filenames.
If you have downloaded the Xebec Barbarossa you will see that the texture filenames all contain the number "08", this is my number, (Duke Surak'nar - 08), it would therefore be a good habit to save your files with something that everyone agrees upon.
But what number to choose?
Well, I would cordially ask for the cooperation of the administrators of this website to maintain a list of Moders and their chosen Codes, in a first come first served basis.
Maybe that list could start as a reply to this thread.
So far however the lists looks like this:
01 - Available
...
03 - Kodo_Boon
...
08 - Duke Surak'nar
...
12 - Verruckt
...
...
66 - Le Diable
...
...
69 - Draksen
...
...
89 - Clutch Marauder
...
...
99 - Available.
This is a list between 01 and 99, the code 00 is reserved, for file troubleshooting.
The choice to have such a code if you are or intend to become a Graphics Moder is really yours, but if you want to avoid answering threads like :
"New Ship File Problem", "This Character Mode does not work with that Mod" etc, it is the simplest solution to follow.
And it does help also people who make installers by reducing the time it takes for them to troubleshoot file conflicts.
(God only knows how many such hours Hosehead spent in the Sea Dogs `Add-on` Installer)
END OF NOTE ---------------------------------------------------------------------------------
Step 5
So once we are happy with our modifications we save our files.
In this case:
bortoutxebec1.tga was saved as bortout08xbs1.tga
and,
deck.tga was saved as 08xb.tga
IMPORTANT: Notice how the number of letters is the same length in both cases. That is important due to the fact that once the textures are replaced in the model their length cannot be changed. So we have to keep same length of filenames.
It is also why at some point there is bound to be filename conflicts but having 2 unique digits insures that there is not such conflict.
Step 6
Reconvert the textures back to the Game format.
If you are using a `plug-in` and directly modify the .dds file then use Rexman's tools to reconvert them back to .tx
If you are modifying .tga then you would need to convert or rather compress them back to .dds.
NOTE: once converted to .dds you will have to rename the file to filename.tga.tx.dds so that Rexman's tools can put it back to .tx correctly.
Step 7
In this step, we will be launching the Hex Editor (again).
So this operation consists of changing the names of the textures in the model to match our texture files.
Reminder: Keep same length of file names otherwise you the model will be corrupted.
So find the deck.tga and change it to match your file.
In this case: deck.tga changes to 08xb.tga
Note: You don't really need to change the complete name, but only add your code, however, if you intend on doing multiple mods you will need different filenames aswell to not conflict with your previous Mod.
Step 8
Copy the files to the appropriate places and make the appropriate code changes in the Ships_init.c and ships.h files and everywhere else needed depending on what you are retexturing.
And your Mod is now ready for your pleasure or for distribution
SPECIAL THANKS:
Rexman for discovering the compression standard used in PotC and making the tools.
Enjoy!
Last edited by a moderator:


