
-


Visit our website www.piratehorizons.com to quickly find download links for the newest versions of our New Horizons mods Beyond New Horizons and Maelstrom New Horizons!-
Join our discord server for regular podcasts/AMA about upcoming and released pirate games (Caribbean Legend, Corsairs Legacy, Ahoy, ERAS 2, etc.):

-
Quick links for Beyond New Horizons
- Download latest version
- Wiki - FAQ - Report bugs here - Bug Tracker on Github -

Quick links for Maelstrom
- Download the latest version of Maelstrom
- Download the latest version of ERAS II - Download the latest version of New Horizons on Maelstrom
-
Join PiratesAhoy! on our social channels:


-

Quick links for PotC: New Horizons
- Download latest version
- Wiki - FAQ - Report bugs here
-

Thanks to YOUR votes, GOG.com now sells:
- Sea Dogs - Sea Dogs: Caribbean Tales
- Sea Dogs: City of Abandoned Ships
Vote now to add Pirates of the Caribbean to the list! -
Quick links for AoP2: Gentlemen of Fortune 2
- Downloads and info
- ModDB Profile
- Forums Archive -

A Pirate Podcast with Interviews
Music, Comedy and all things Pirate!
- Episode Guide - About - Subscribe -
- Twitter - Facebook - iTunes - Android -
- Youtube - Fill the Coffers -
CryEngine - Setting up sound for ingame use
- Views Views: 778
- Last updated Last updated:
-
This tutorial will be updated regularly! (21. Feb 2014)
This tutorial will explain how to setup own sound for use inside CryEngine.
The CryEngine use an own fileformat to handle sounds. This system is need to fit in Cryteks wish to steer all input formats and its handling inside the Mannequineditor.
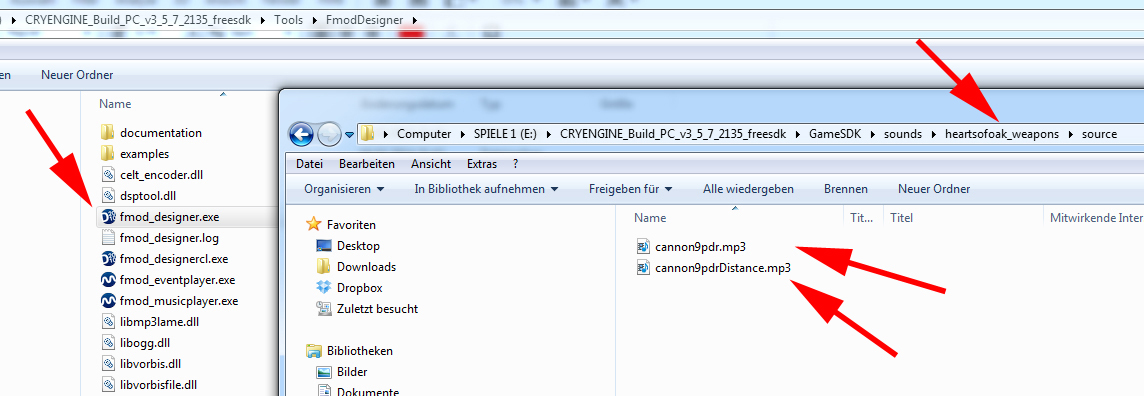
At first you need to setup in your CryEngine root the folder "Sounds" (if it not exist) and the folder you need to have for your customsounds. In my case is this "heartsofoak_weapons". Inside this root I have placed the folder "source" where I placed the sound source files. In my example I have chosen MP3-files.
To prevent sound issues, the CryEngine use two sound files for different situations:
1. The first person sound and
2. The distance sound
I take for this example the same sound, copy them and rename to "Distance". The setting you do inside the FMOD designer distinguish it.
When you have finished this preparing, please start "fmod_designer" inside your "CryEngine/Tools/FmodDesigner" root:
PICTURE:
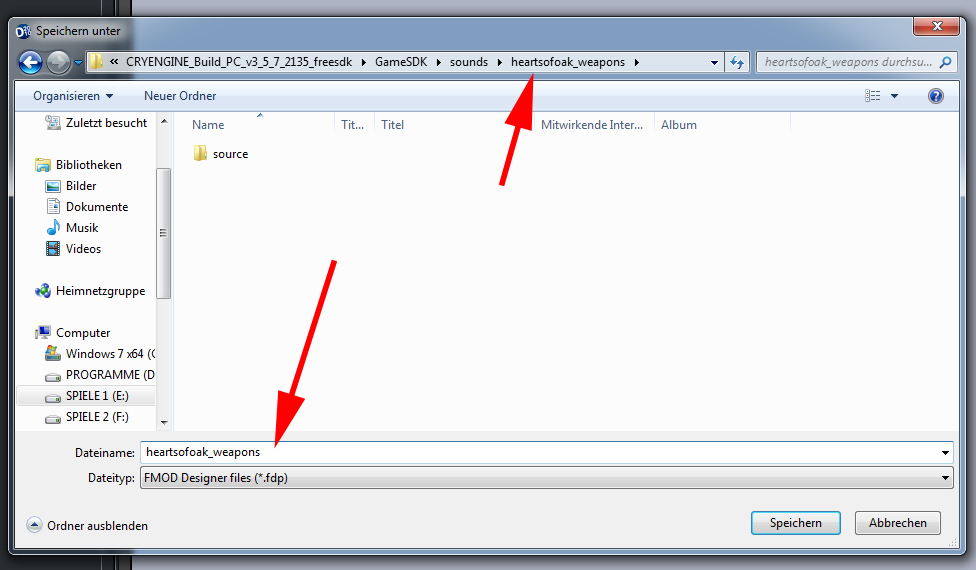
Is FMOD designer started, chose FILE and "NEW PROJECT":
PICTURE:
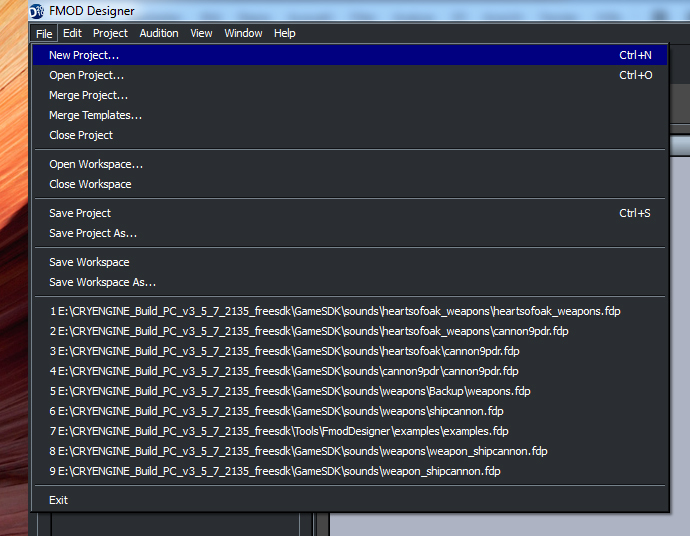
Now its important to name the projectfile exactly the same (case sensitive) like the folder you have created in the "Sounds" root. That means: "heartsofoak_weapons" in my example. Save the file in this root and not in the "Source" root!
PICTURE:
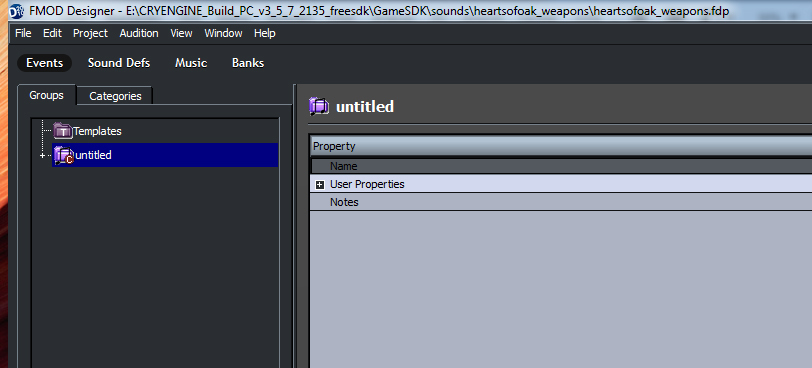
After this step, FMOD designer is starting and you got the situation, the next pictures is showing. You have 4 categories: "EVENTS", "SOUND DEFS", "MUSIC" and "BANKS".
PICTURE:
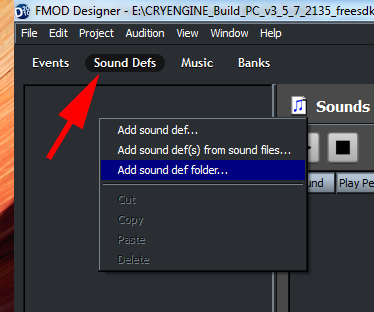
Change to the "SOUND DEFS" categorie and make an mouse right click in the window below the categorie buttons. Chose "ADD SOUND DEF FOLDER" and name it "Sounds":
PICTURE:
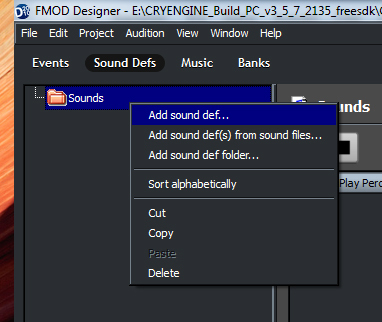
If you have created this folder, make an mouse right click on it and create an "ADD SOUND DEF":
PICTURE:
The folder you create, should be named in easy to understand way. We need two "SOUND DEFINITIONS", so please create a second folder, for the distance sound. After this, please highlight the first one "FIRE_MEDIUM" and make a mouse right click in the right "SOUNDS" window:
PICTURE:
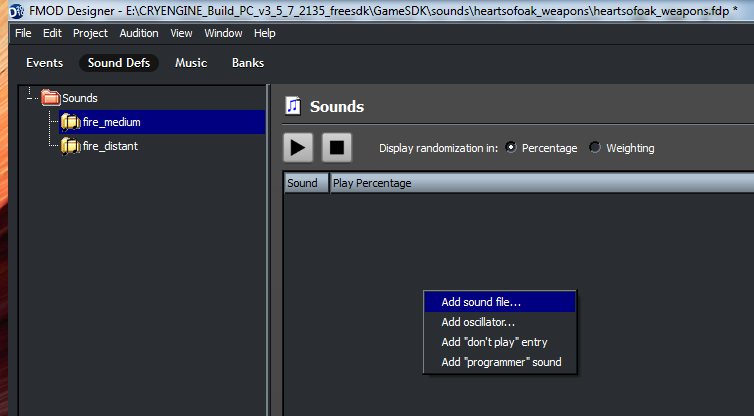
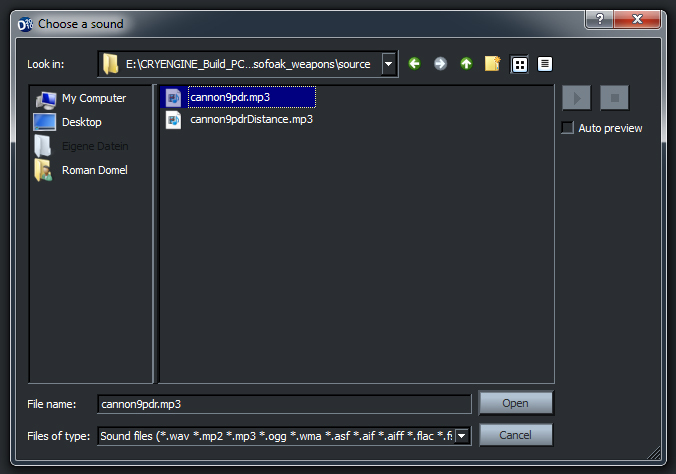
You are in the "FIRE_MEDIUM" sound definiton, so please chose your normal sound and not the distance one:
PICTURE:
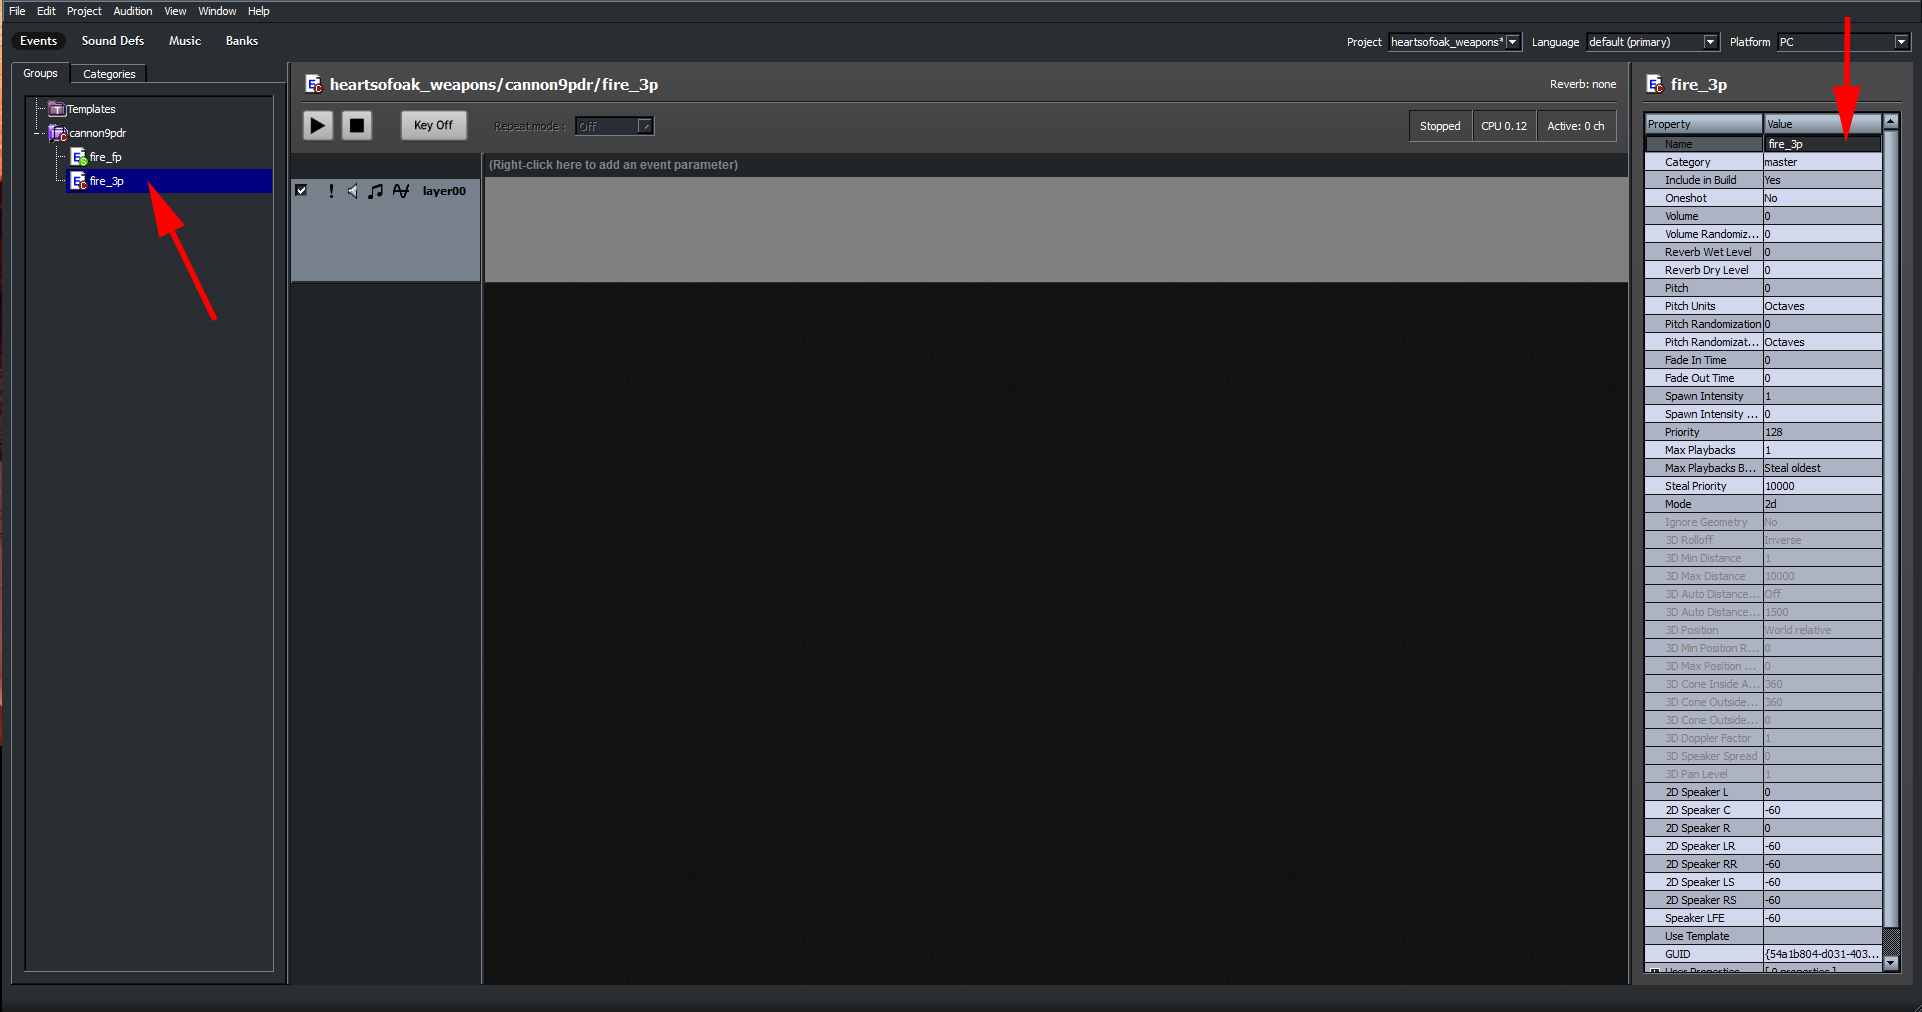
Change now back to the "EVENTS" categorie and rename the "UNTITLED" folder to your name. In my example I have chosen "cannon9pdr":
PICTURE:
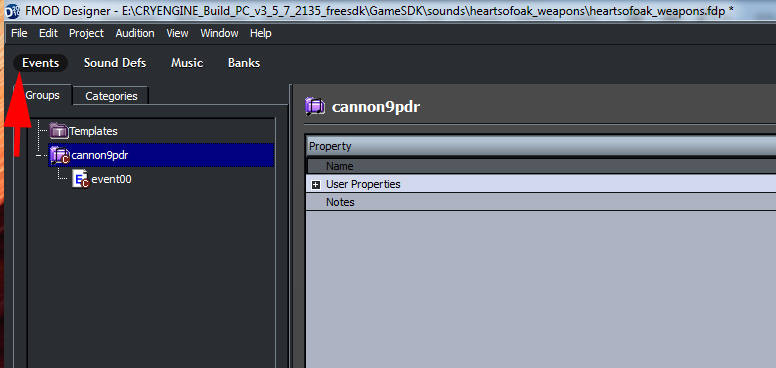
After you have done this, please rename the "EVENT00" node too. In my example I have chosen "FIRE_FP":
PICTURE:

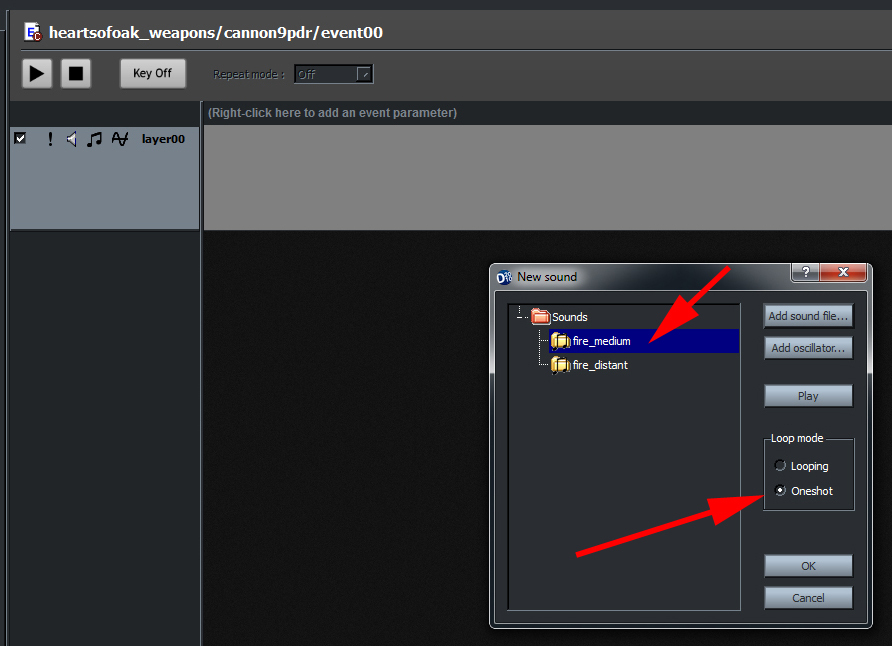
In the next step, please make an mouse right click in the grey bar "LAYER00" and chose "ADD SOUND":
PICTURE:
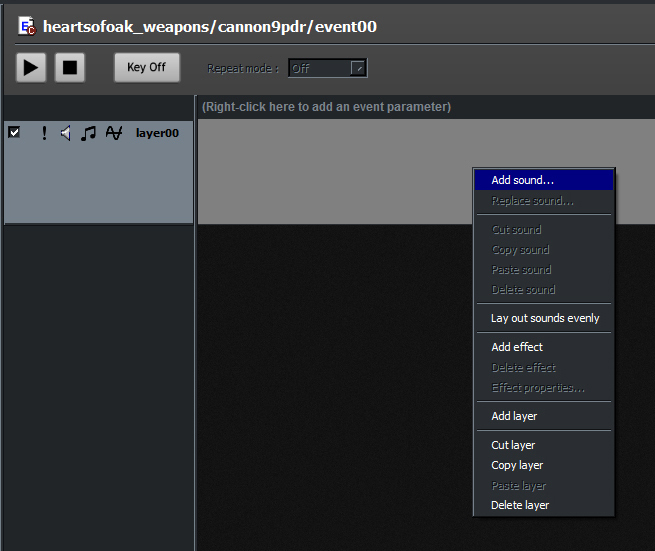
In "Hearts Of Oak" we have mostly single sounds (oneshot - sounds), so chose the first sound definition, change the option to "ONESHOT" and click OK.
PICTURE:
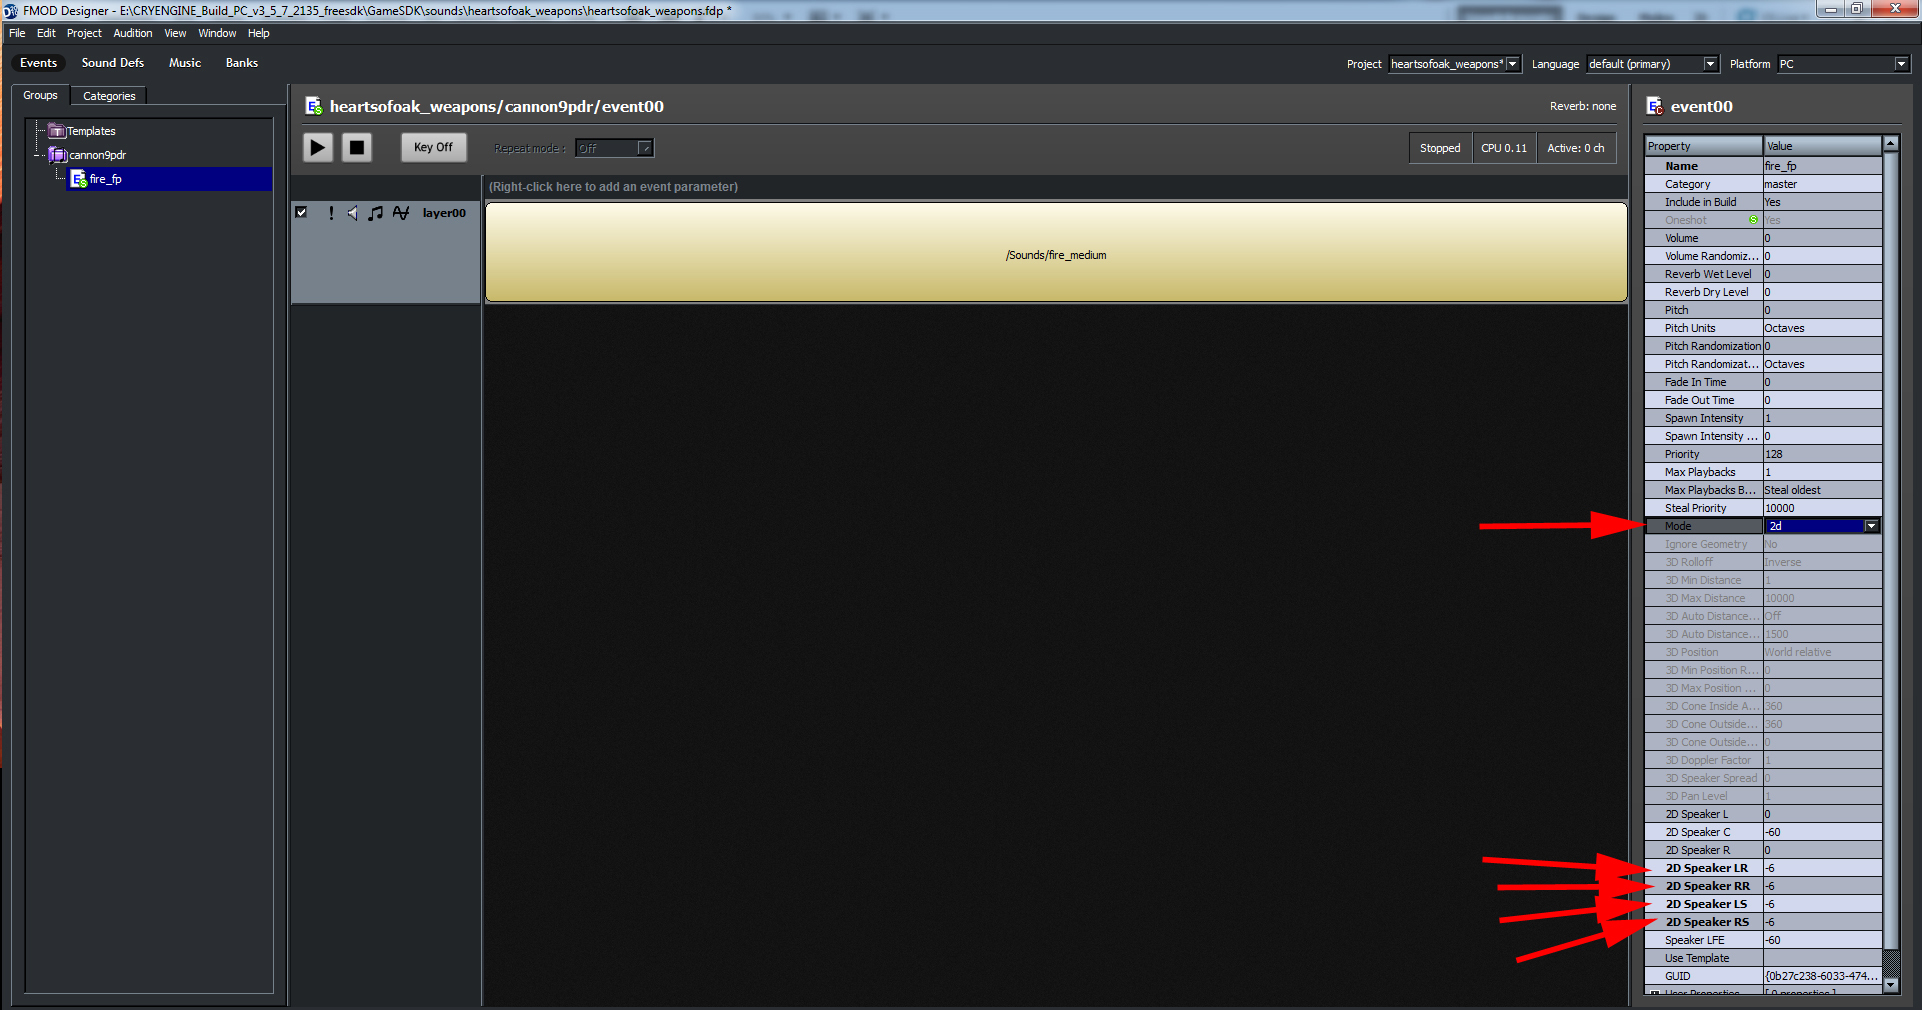
The sound is now linked to this layer. Please setup the options, the next picture is showing. We setup the first sound, its the first person sound. Its only one channel, set to "2D" and with changed surround options in the settings below.
PICTURE:
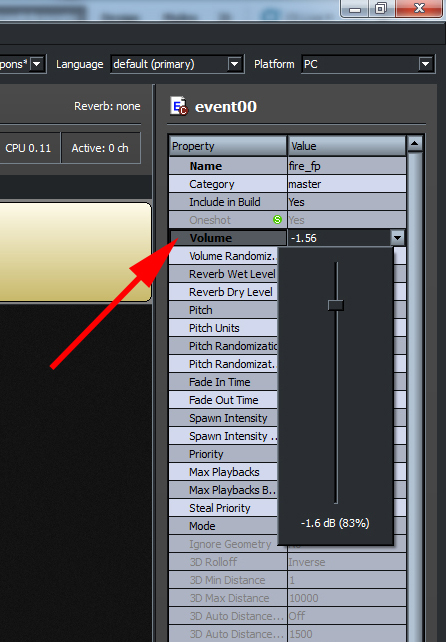
After this, please reduce the "VOLUME" to around 80% from the maximum level.
PICTURE:
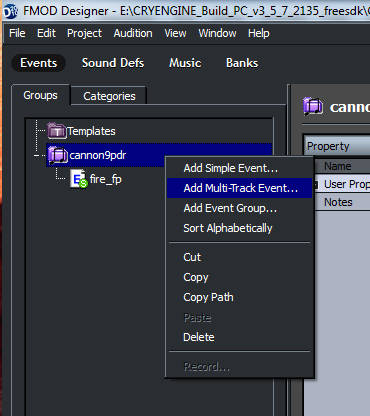
In the next step, please highlight your "EVENTS" folder (in my example "cannon9pdr") and "ADD MULTI-TRACK EVENT" for our distance sound.
PICTURE:
Name the event similar to your first one BUT with the distance definition in the name. In my example I have chose "FIRE_TP".
PICTURE:
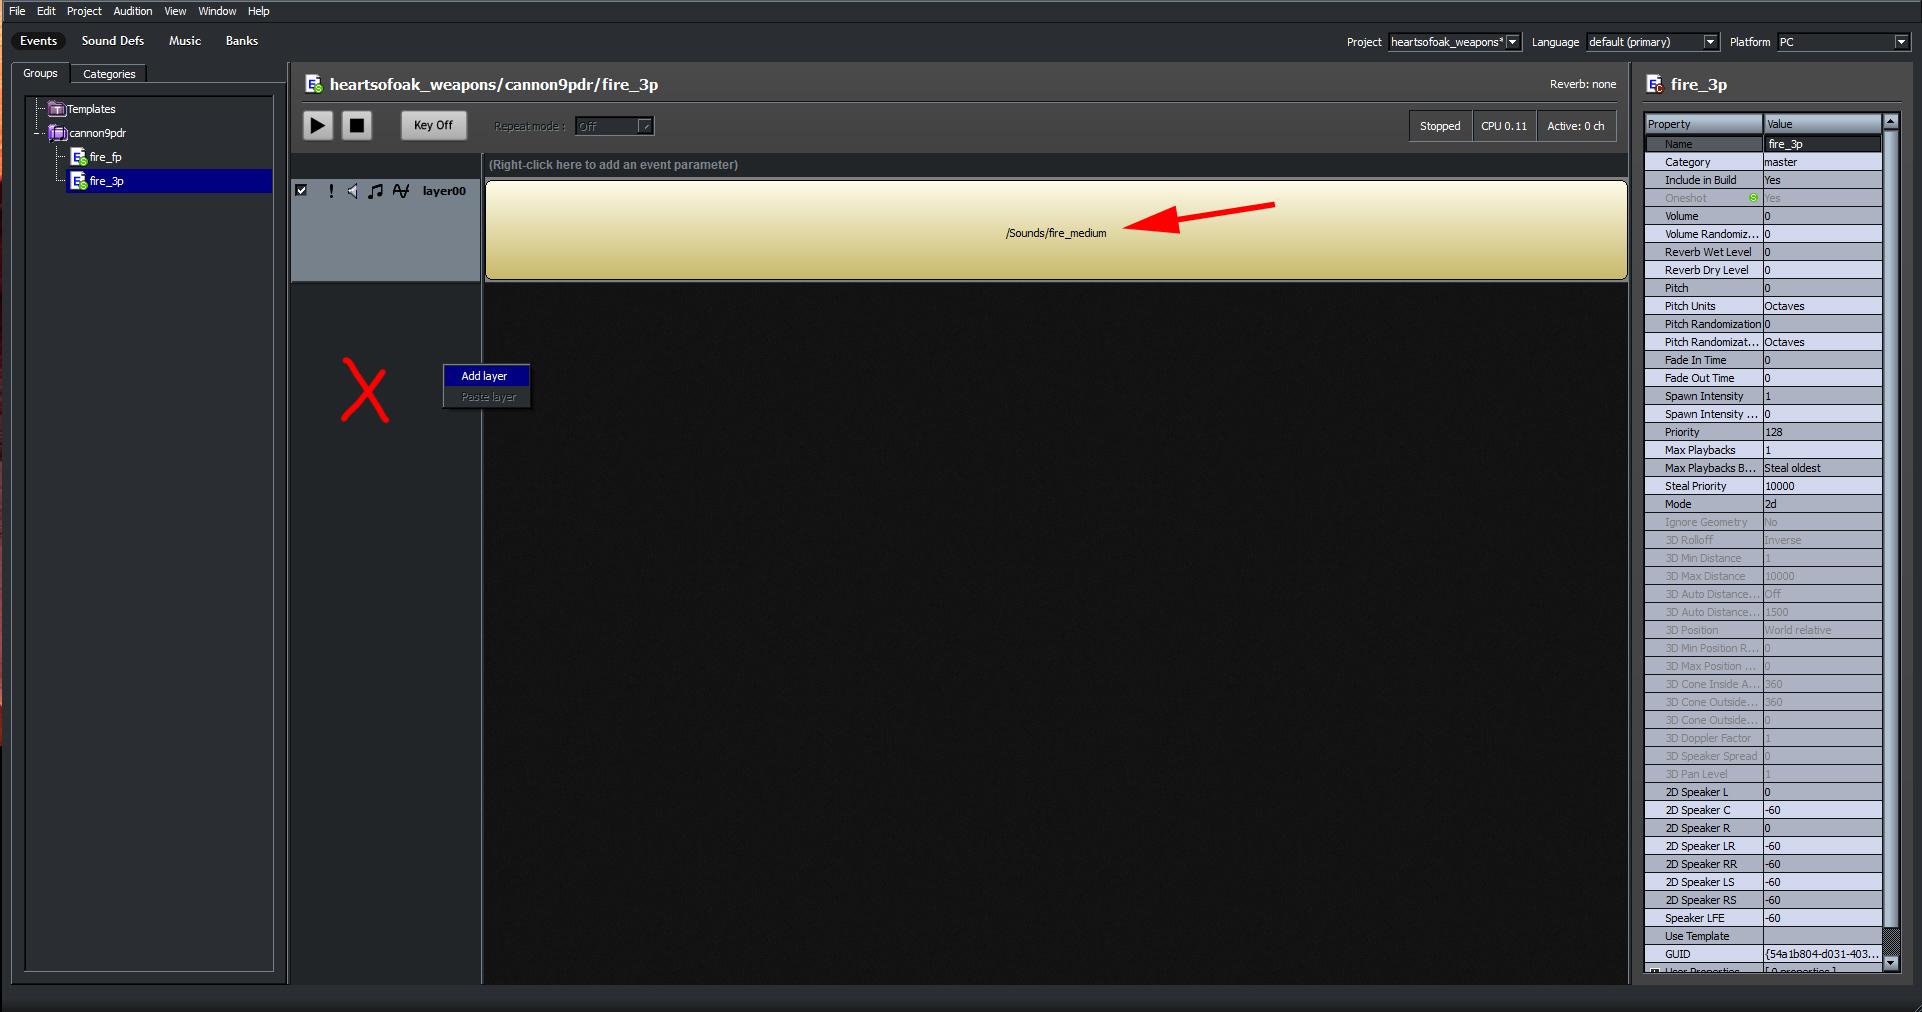
Add to the "LAYER00" now the same sound definition like in "fire_fp" and make then a mouse right click in the window, the red cross markes. And "ADD LAYER".
PICTURE:
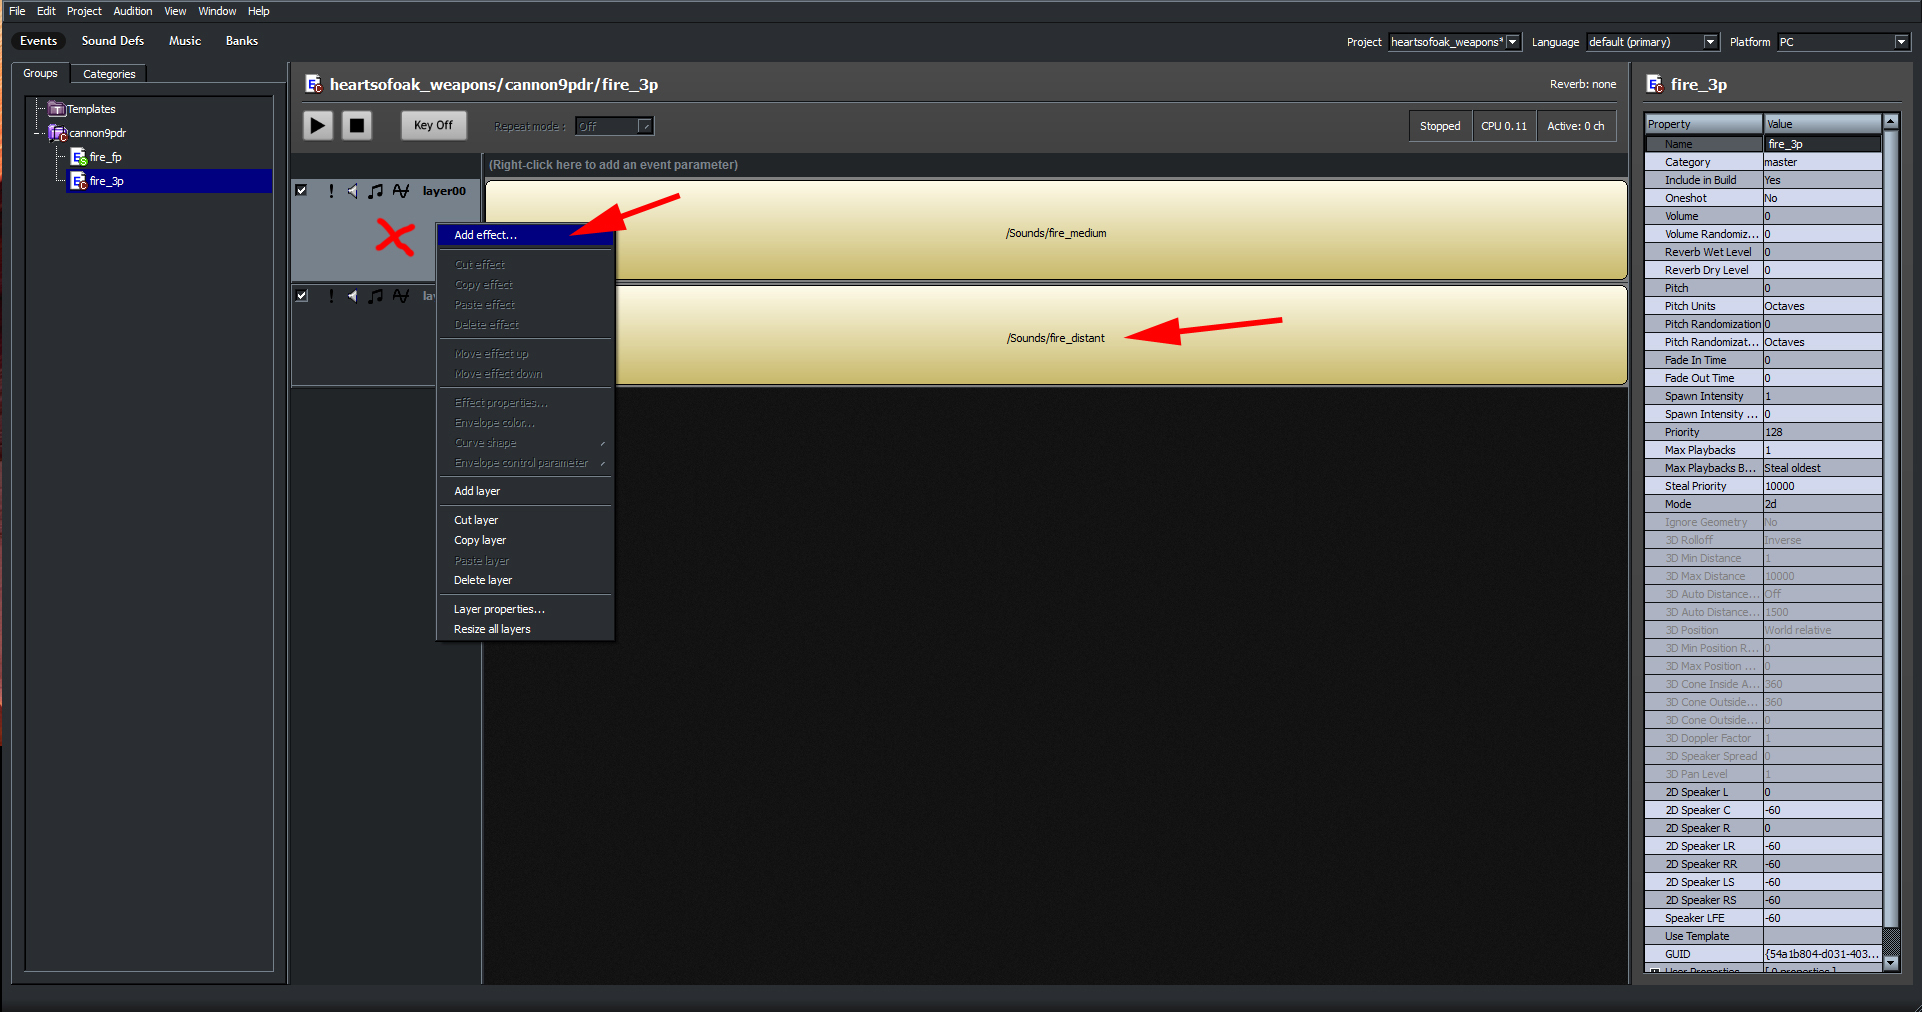
In the new layer, please add now the "DISTANCE" sound from your source folder and make then a mouse right click in the "LAYER00" (the red cross markes where I mean). Chose "ADD EFFECT".
PICTURE:
Chose in the upcomming list "REVERB BALANCE".
PICTURE:
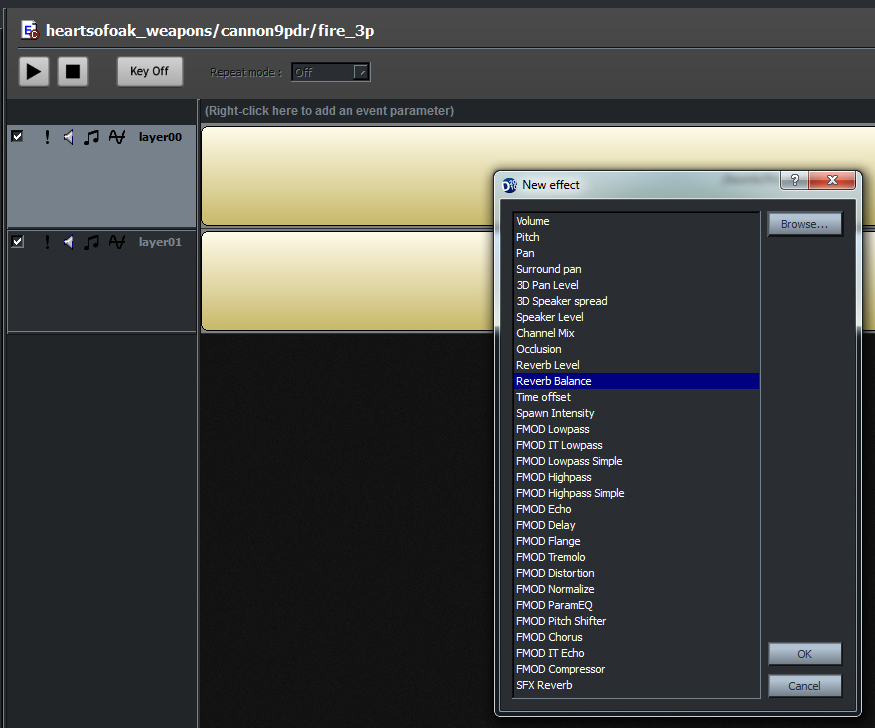
Repeat this step in "LAYER01" and you get this situation:
PICTURE:
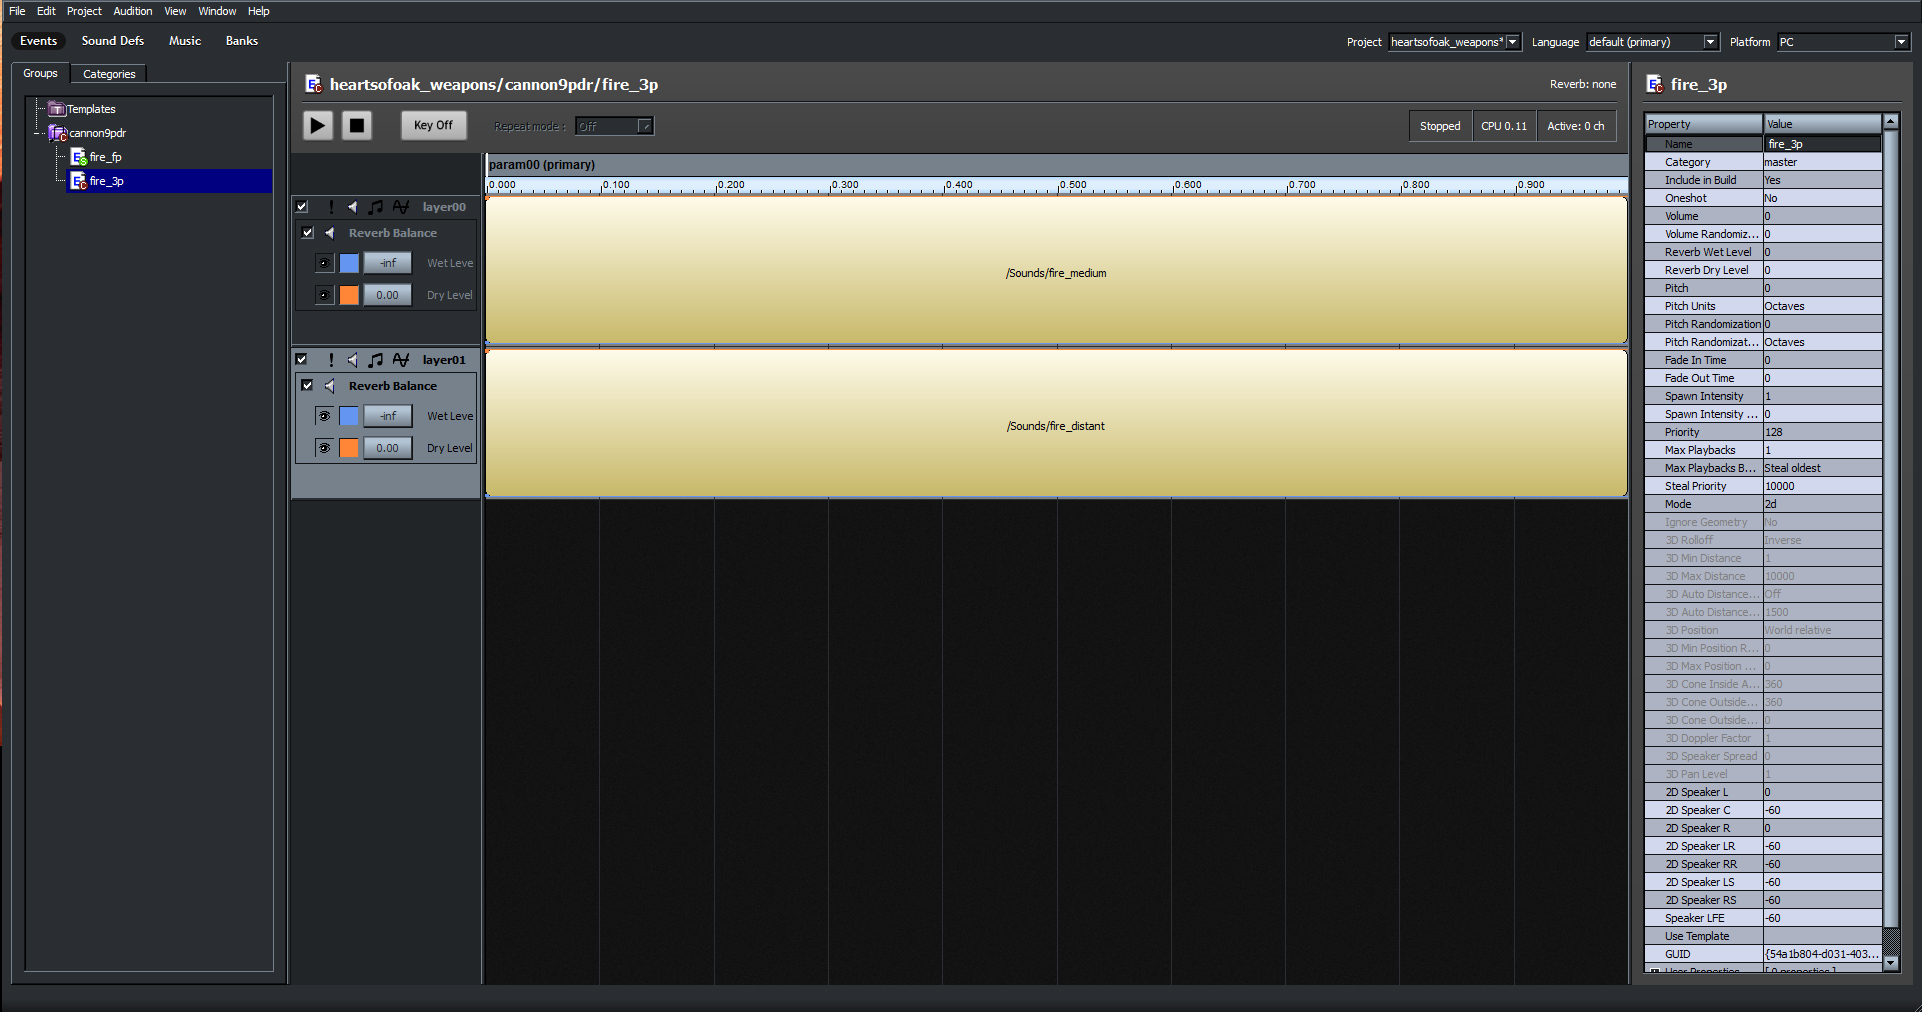
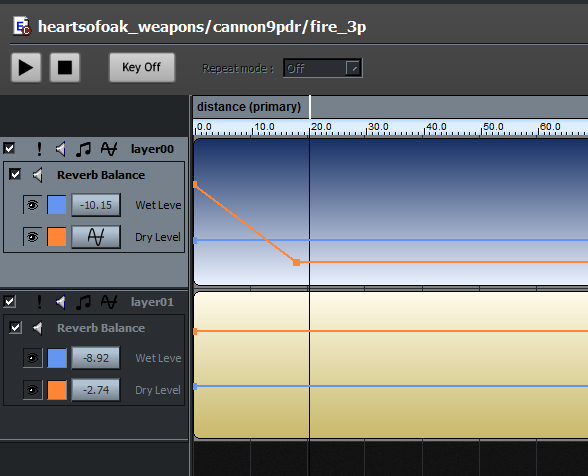
When you take a look to the layers, you can notice in the color of the new "effects" lines. An orange at the top per layer and one blue at the bottom. Grap this lines at the handles and move it for better handling to a better position.
PICTURE:
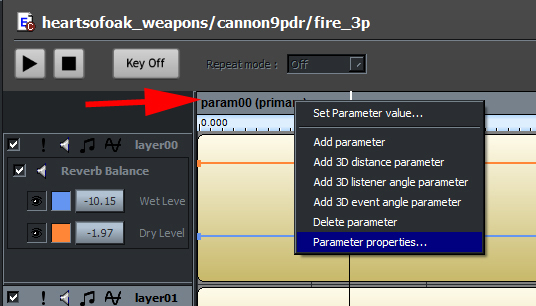
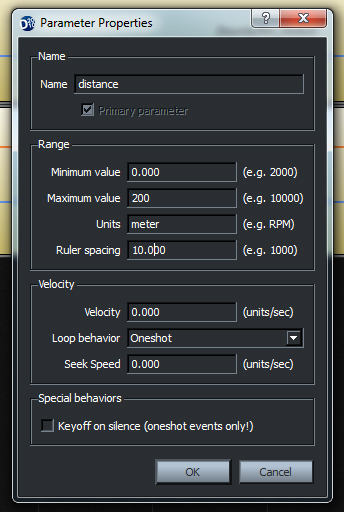
In the next step, please make an mouse doubble click to the "PARAM00 (PRIMARY)" bar at the top of the layers and set the values, the picture after the next picture is showing.
PICTURE:
PICTURE:
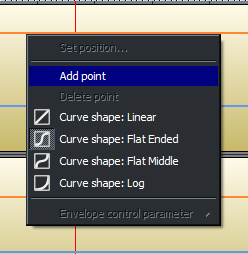
After setting up the parameters, please move the mouse over the first effect-line in layer00, make an right mouse click and "ADD POINT". When you do this, please notive the other options "CURVE SHAPE". You need it in the next steps, to setup your sound.
PICTURE:
When set a new point and move it a bit around, the line becomes a curve with the standard shape. Set the red playline to around 15-20m and set the red point there. Play then the test and listen the result. Notice ever WHAT you need the sound for and set the meters wise. This prevents doubbling effects ingame. Thats the sense behind this settings.
PICTURE:

Remember now the options behind "CURVE SHAPE" and change it to "LINEAR"
PICTURE:
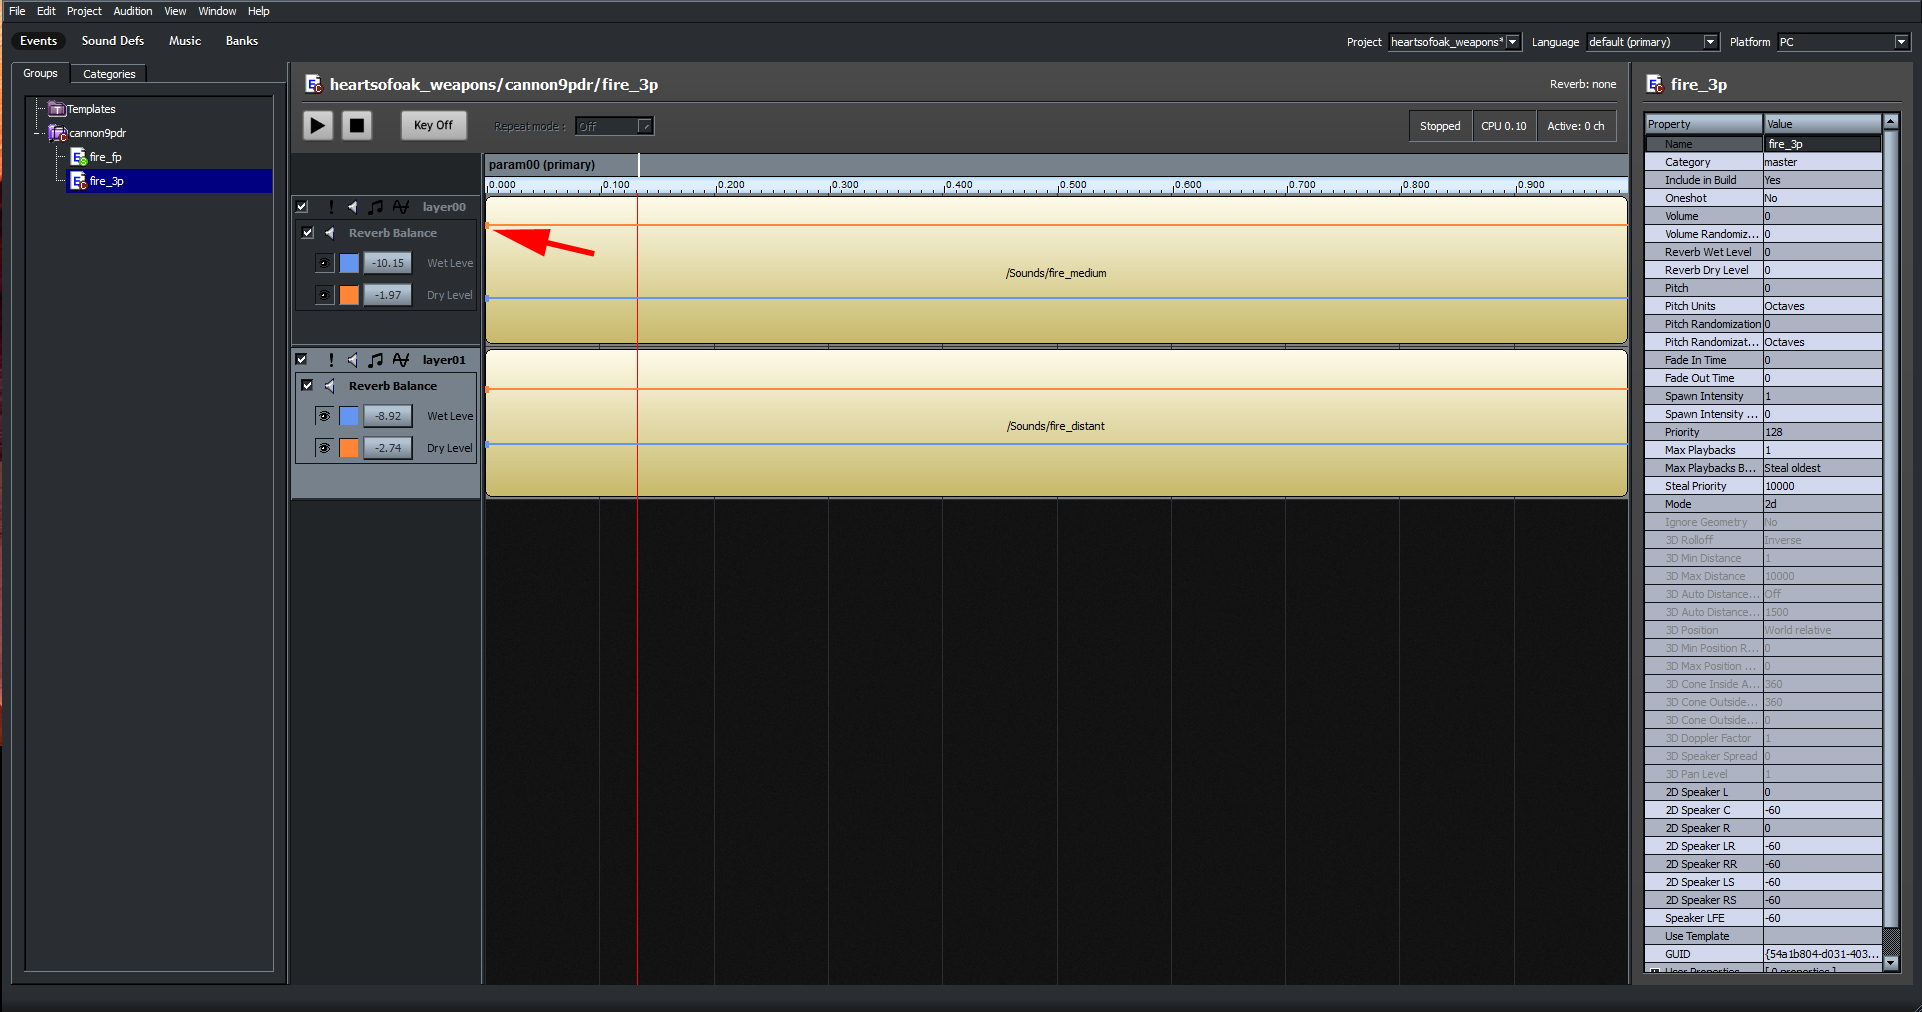
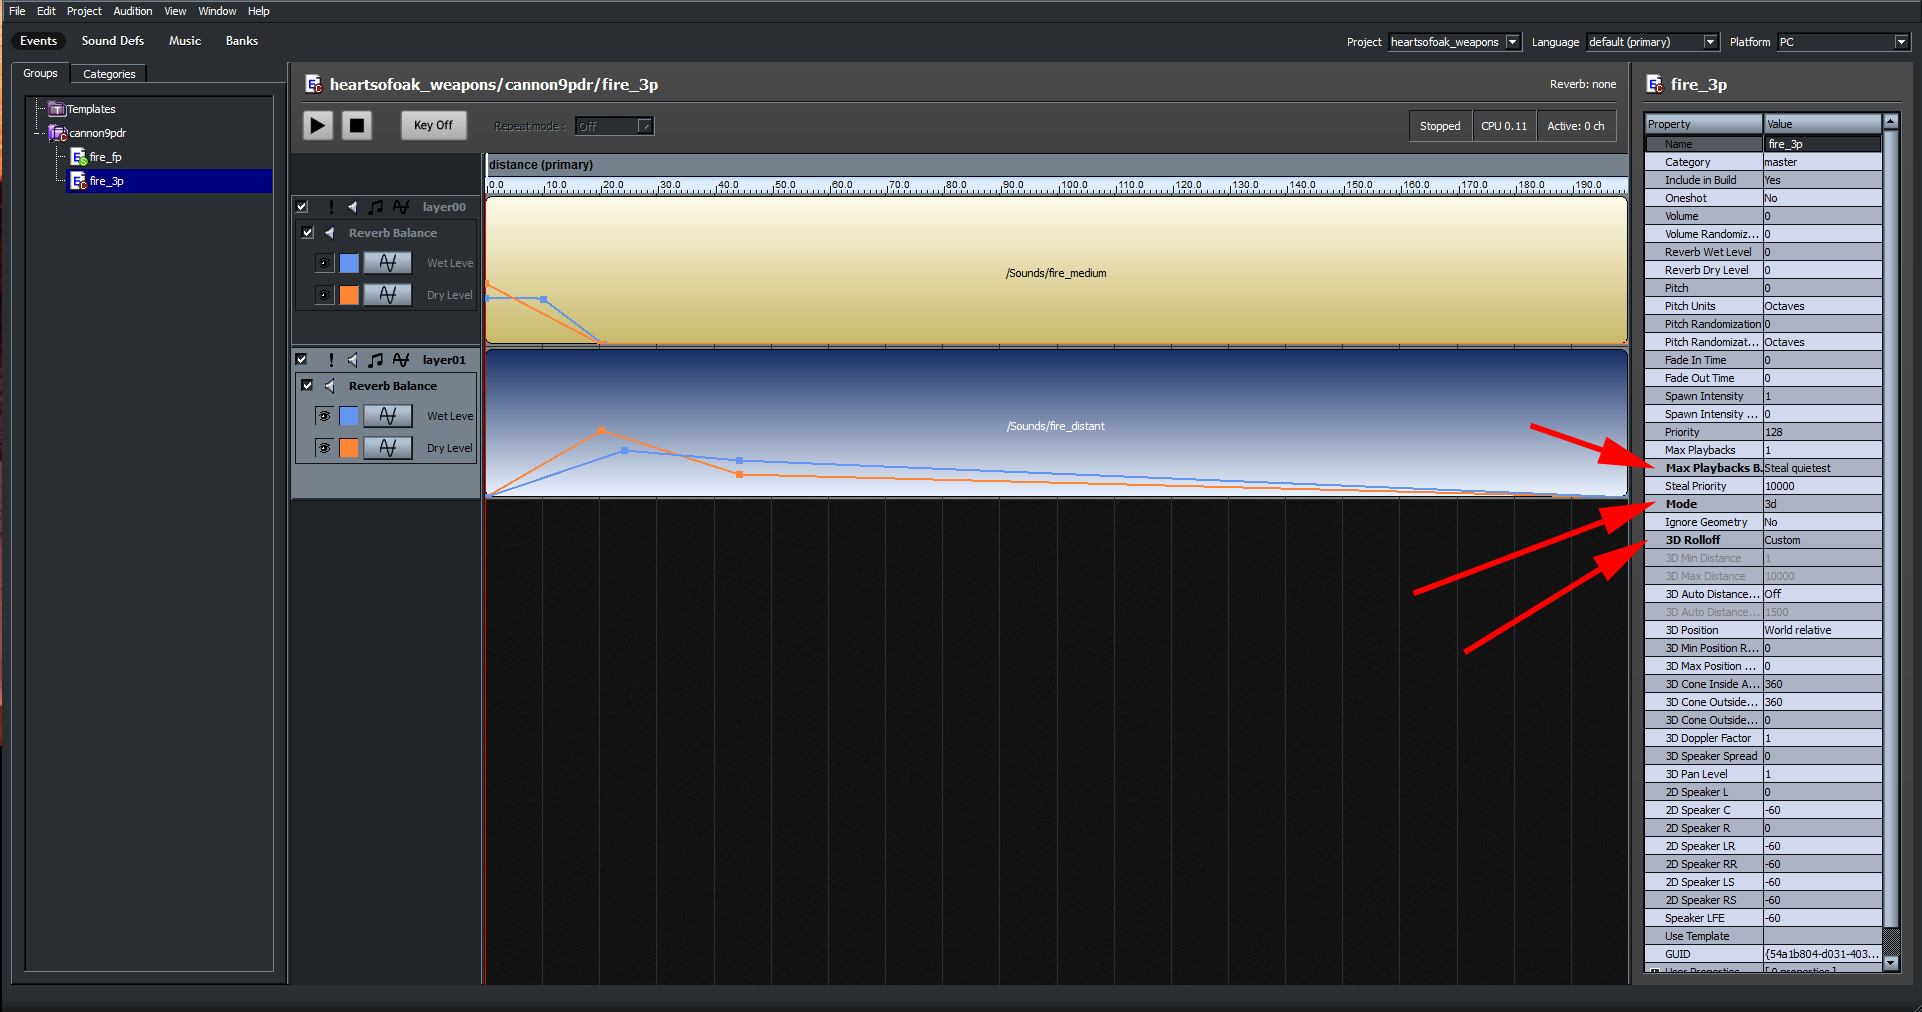
Setup now the lines to a good working setup and change then the options, the red arrows are point to.
PICTURE:
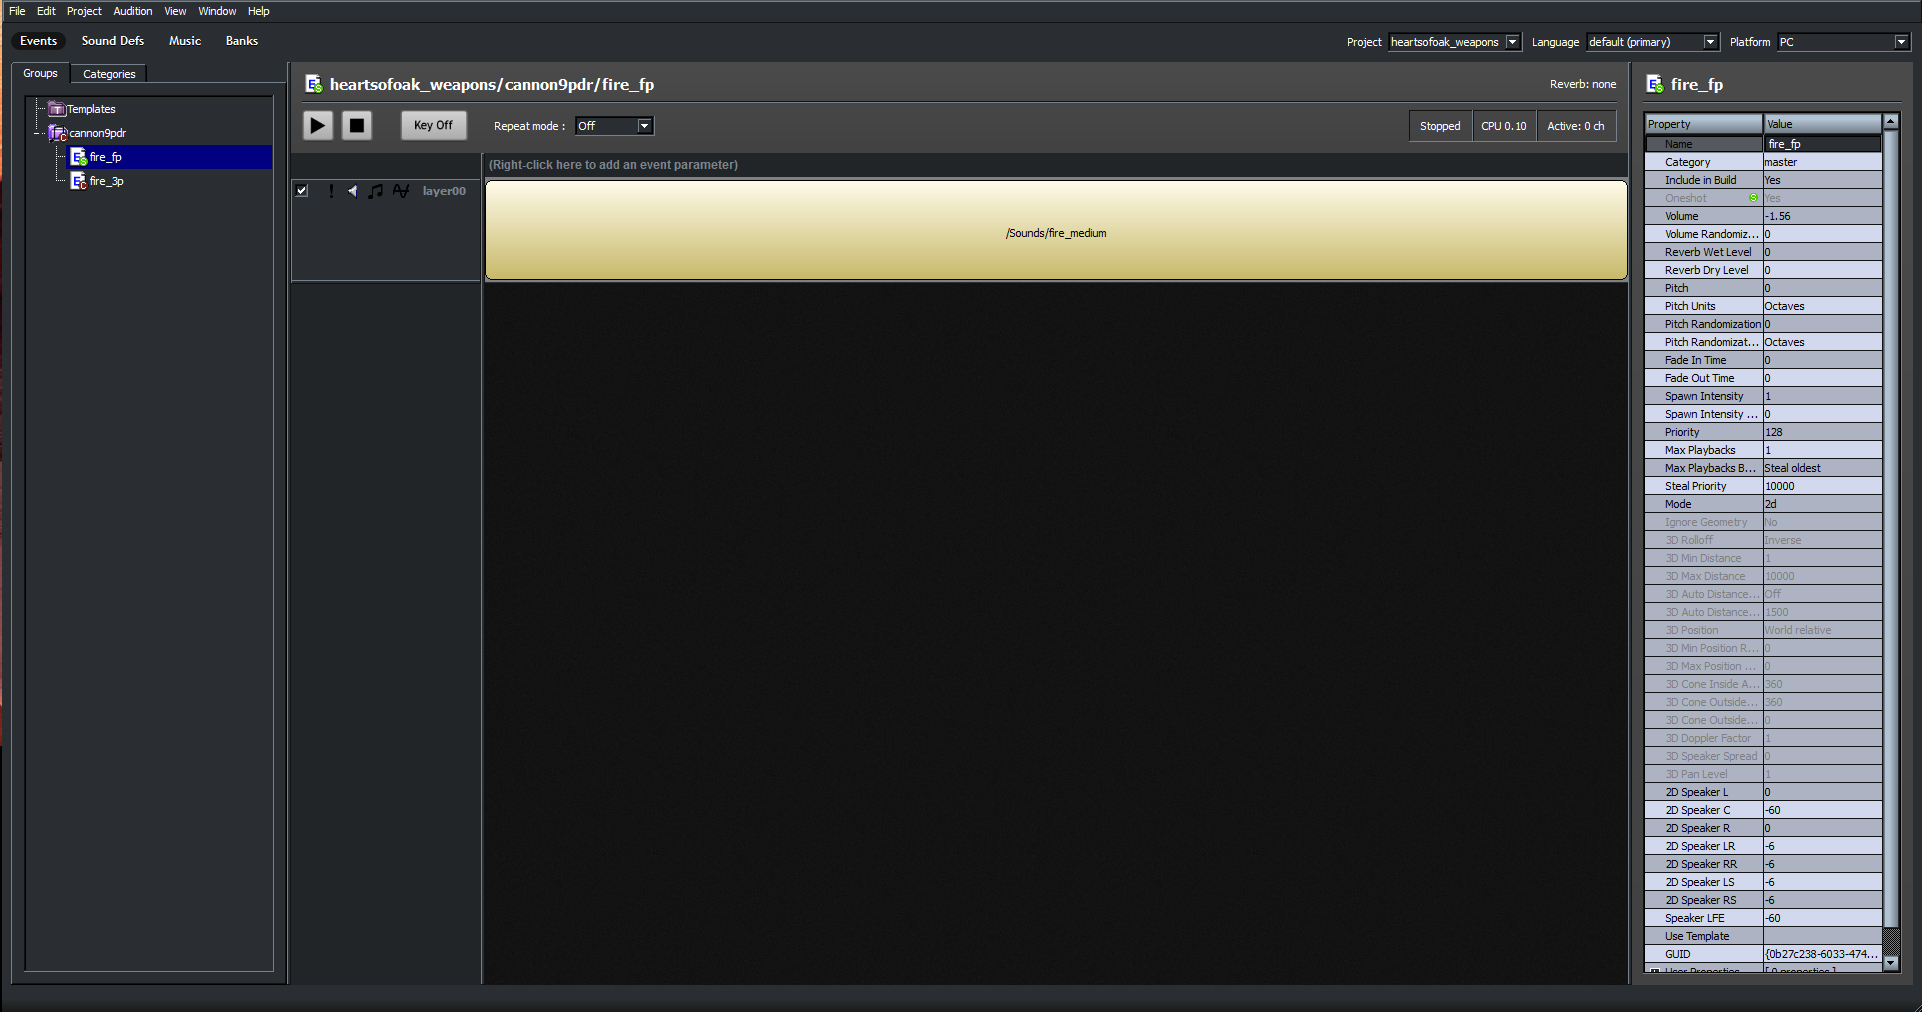
Here the comparison with the first "FIRE_FP" setup:
PICTURE:
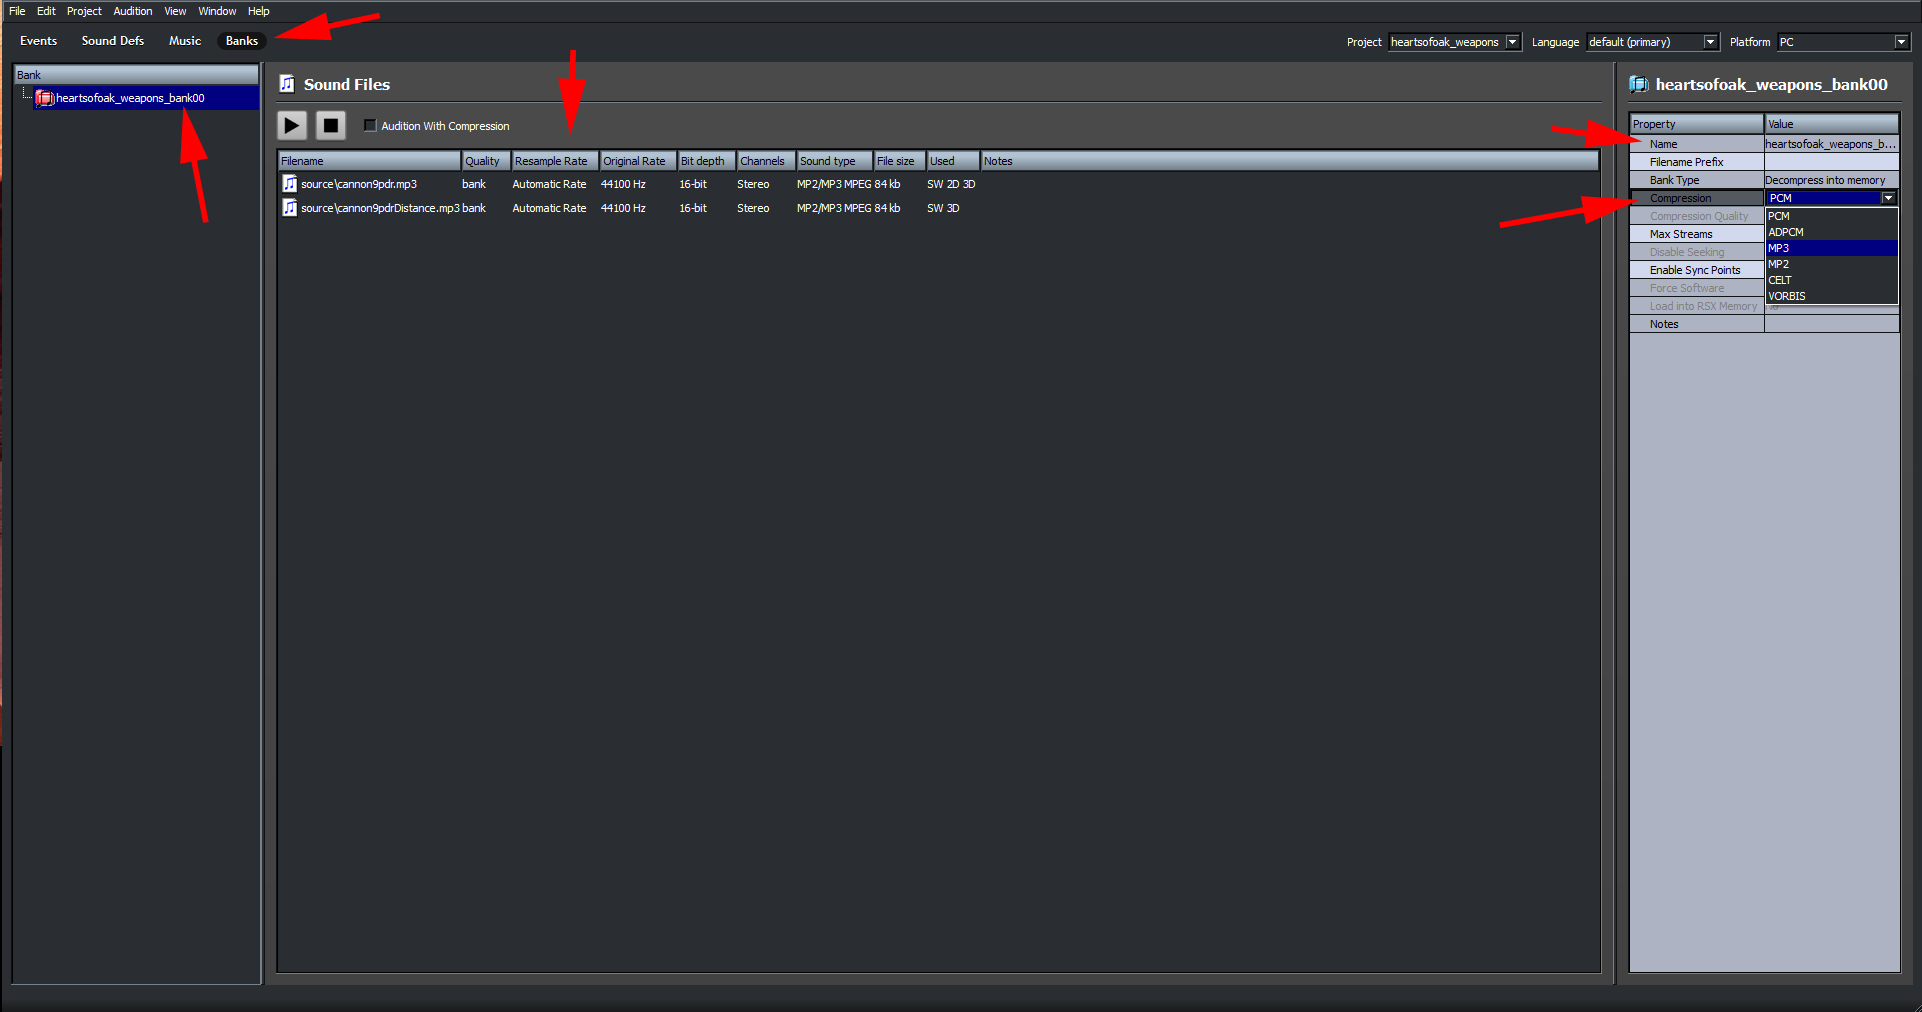
Please change now to the categorie "BANKS" and rename it (delete just the "Banks" entry if you like) and set the "COMPRESSION" to your source format. In my example "MP3".
PICTURE:
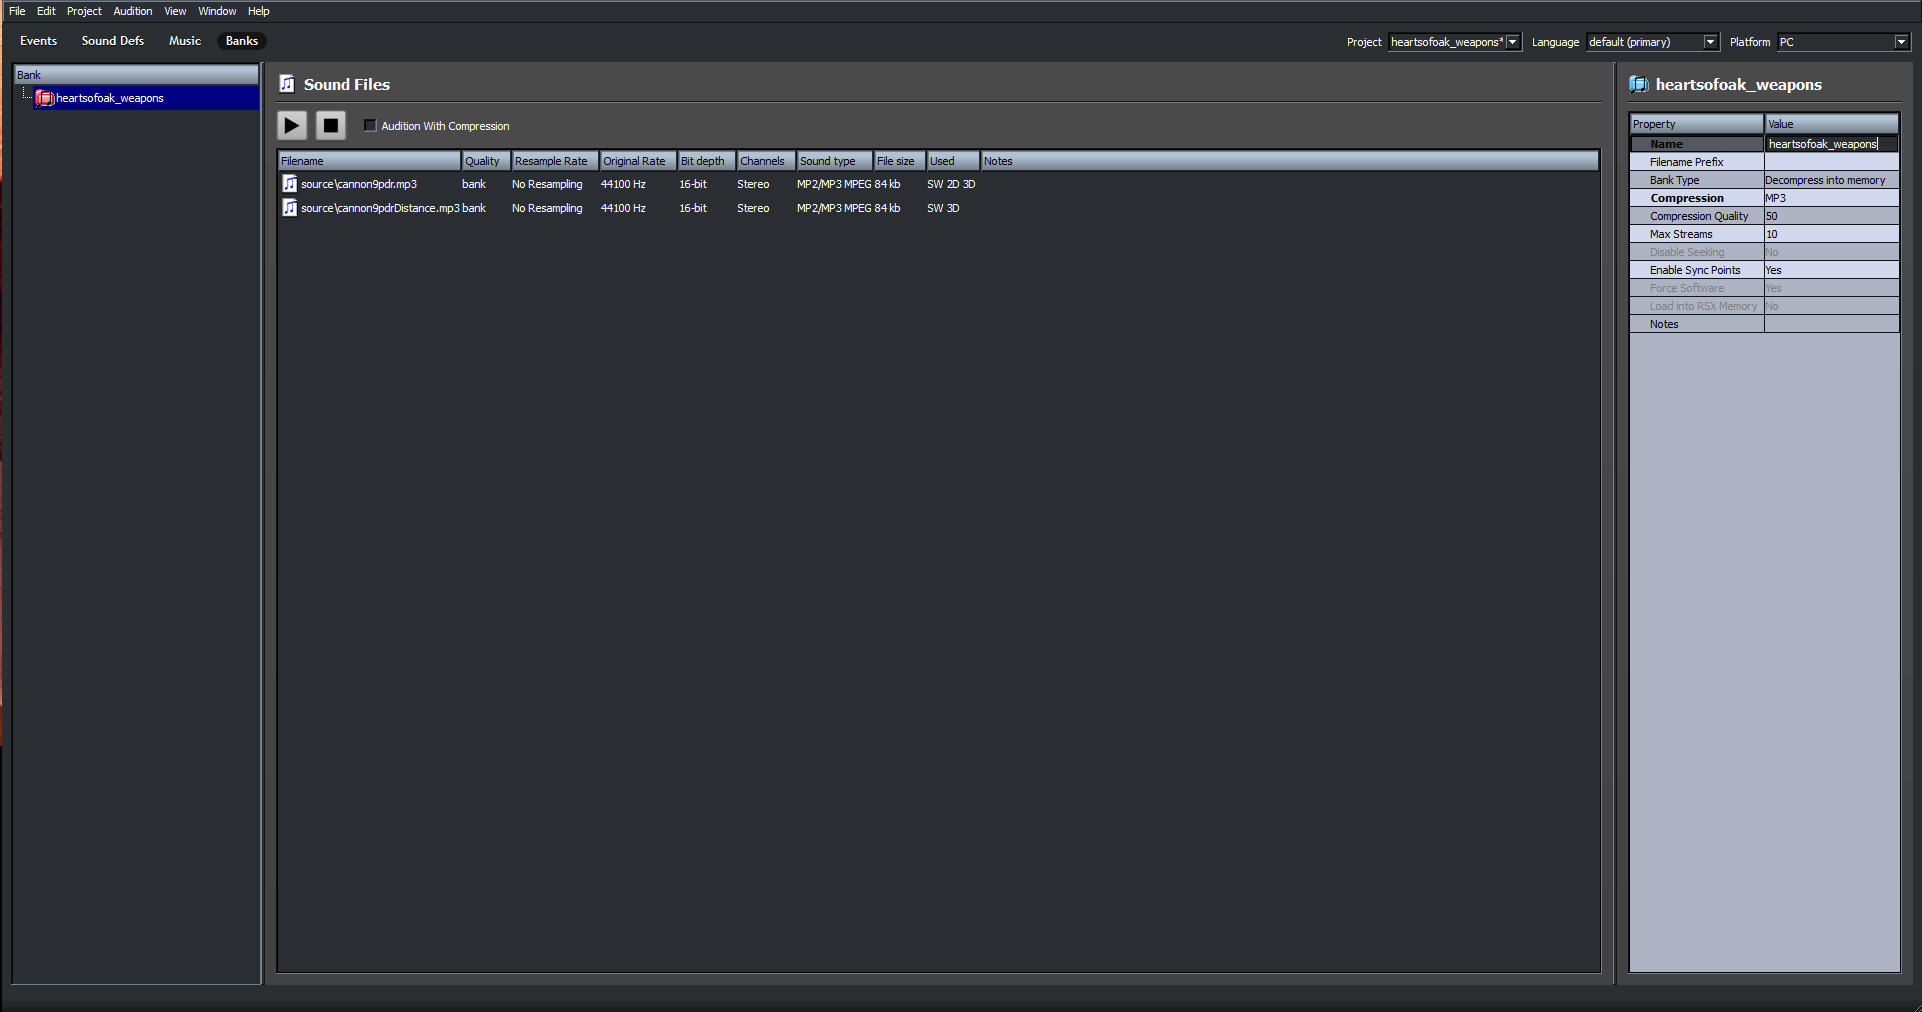
Here the final result after setup the "BANKS" entrys:
PICTURE:
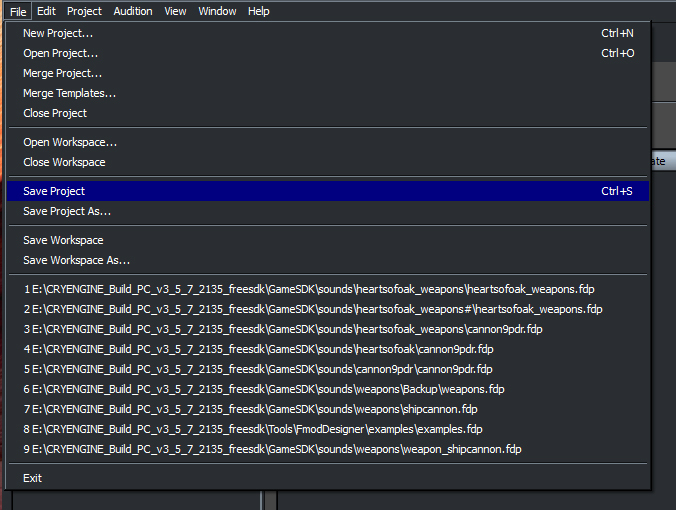
Save now the project.
PICTURE:
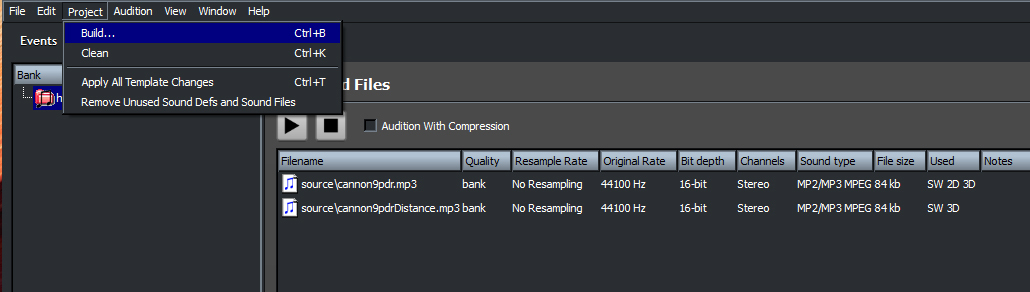
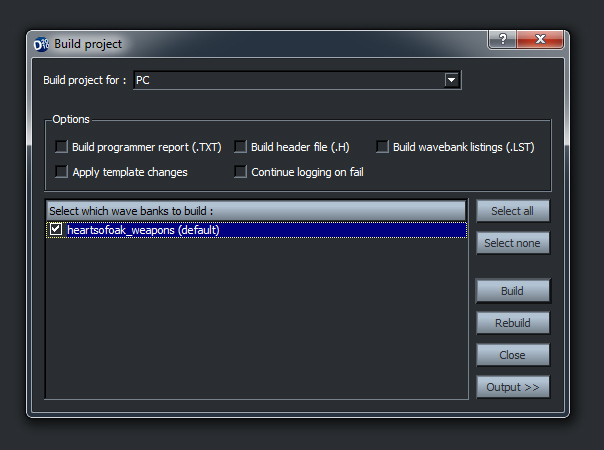
In the next step we need to build the database for using the sound in the CryEngine.
PICTURE:
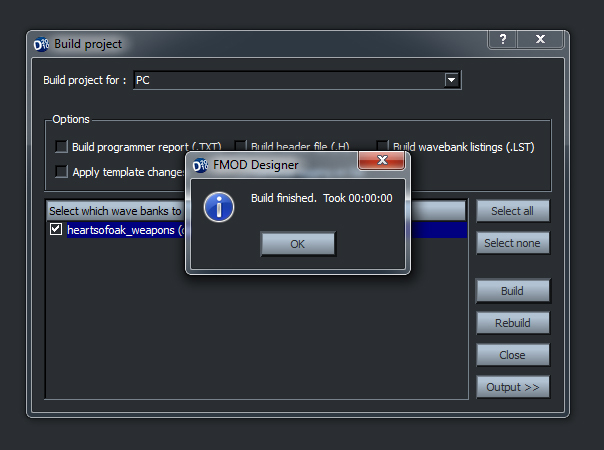
Settings when building:
PICTURE:
PICTURE:
In the next step, we edit our new sound into the preload definition. It prevents stottering sounds ingame. For this, we need to extract the needed file from the original PAK. Please open the Gamedata.pak with WINZIP.
PICTURE:
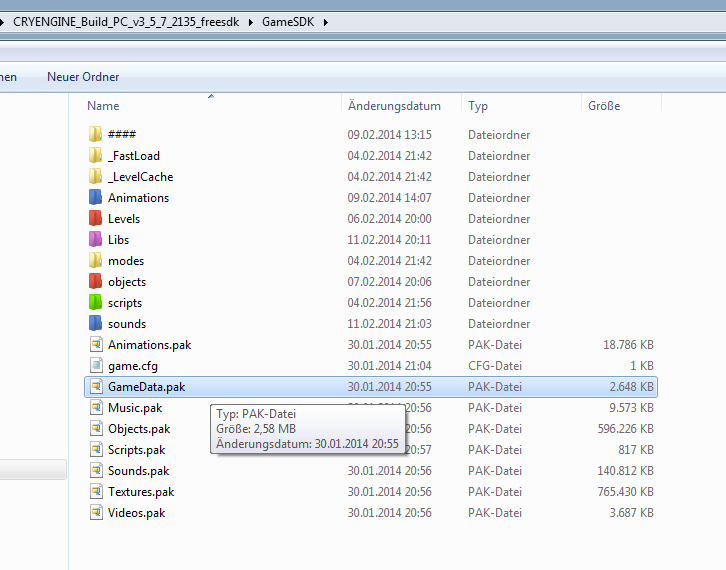
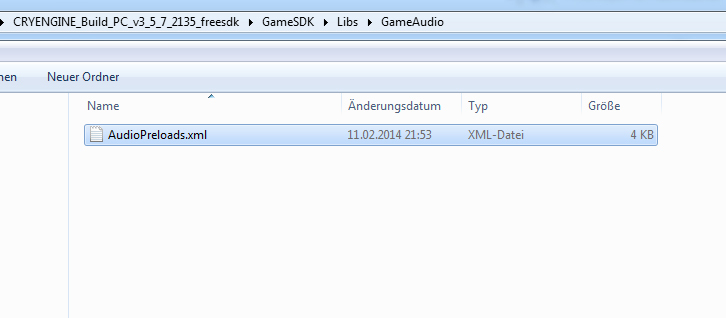
Browse to "LIBS/GAMEAUDIO" and extract with mouse right click the file "AUDIOPRELOADS.XML". Notice the folder structure! A files the CryEngine reads, are stored in containers named "PAKs". The CryEngine read this files in priority order! That means, that files, stored NOT in a PAK but in the original root in the GAMESDK folder, read first.
PICTURE:
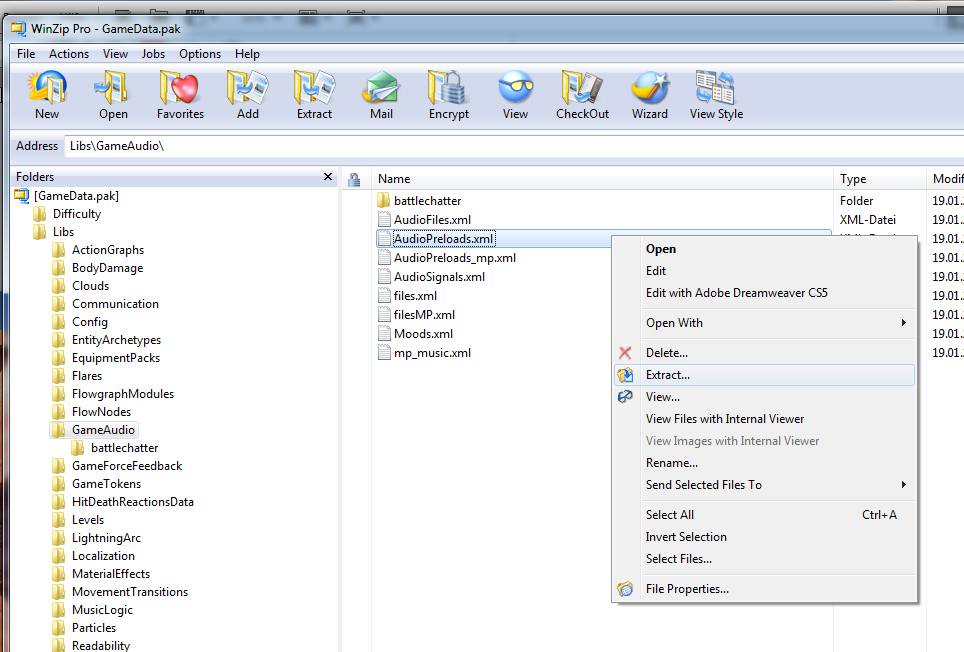
This knowledge we use now and create this folderstructure in our GAMESDK root and place the extracted file in.
PICTURE:
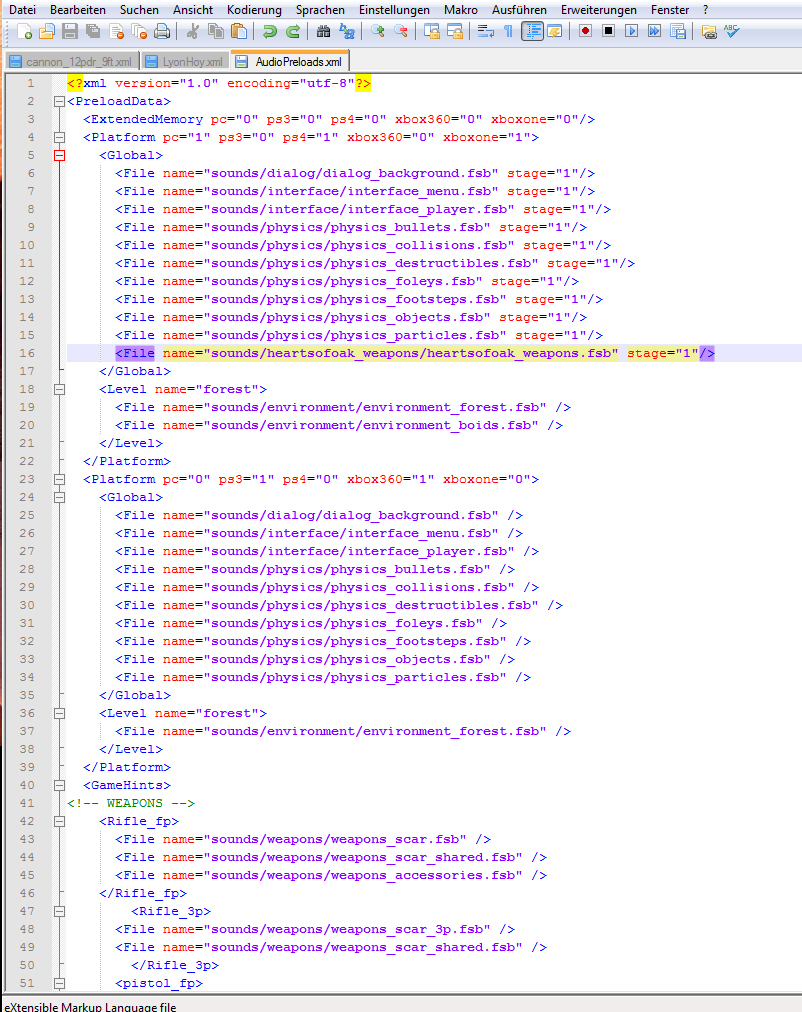
Open the extracted "AUDIOPRELOADS.XML" with the recommend tool "NOTEPAD++" and add the new sound to the global preload:
PICTURE:
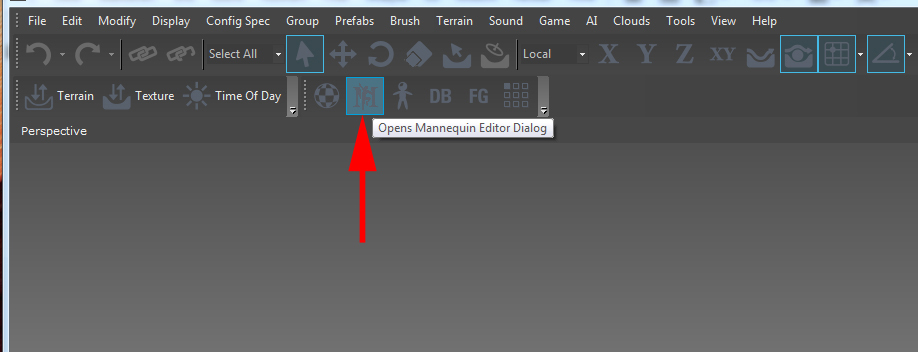
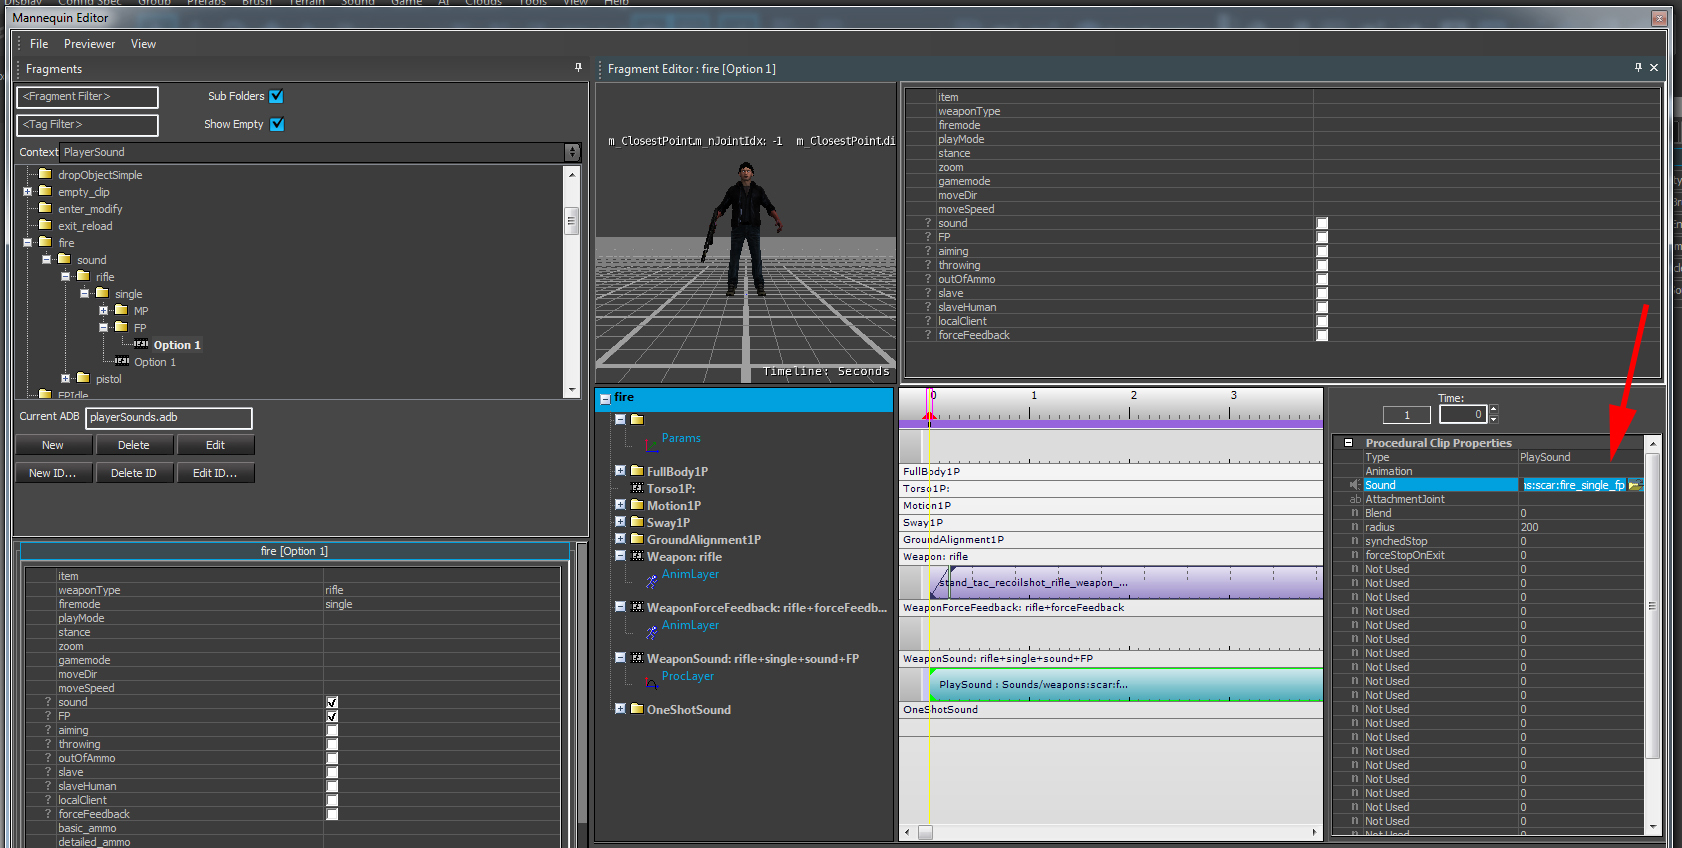
Now we want to test our new sound! Start now the Free SDK and open the Mannequineditor:
PICTURE:
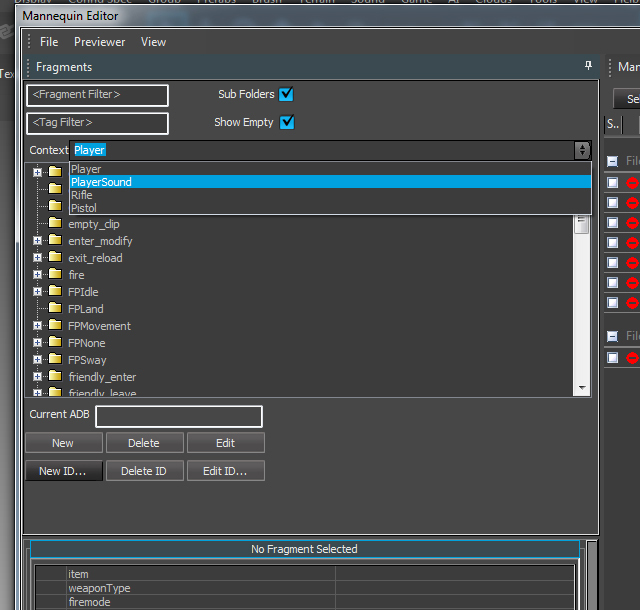
Change the CONTEXT to "PLAYERSOUND"
PICTURE:
Open from the "FIRE" folder any "Option" setup (mouse left click) and change the soundfile to your new one.
PICTURE:
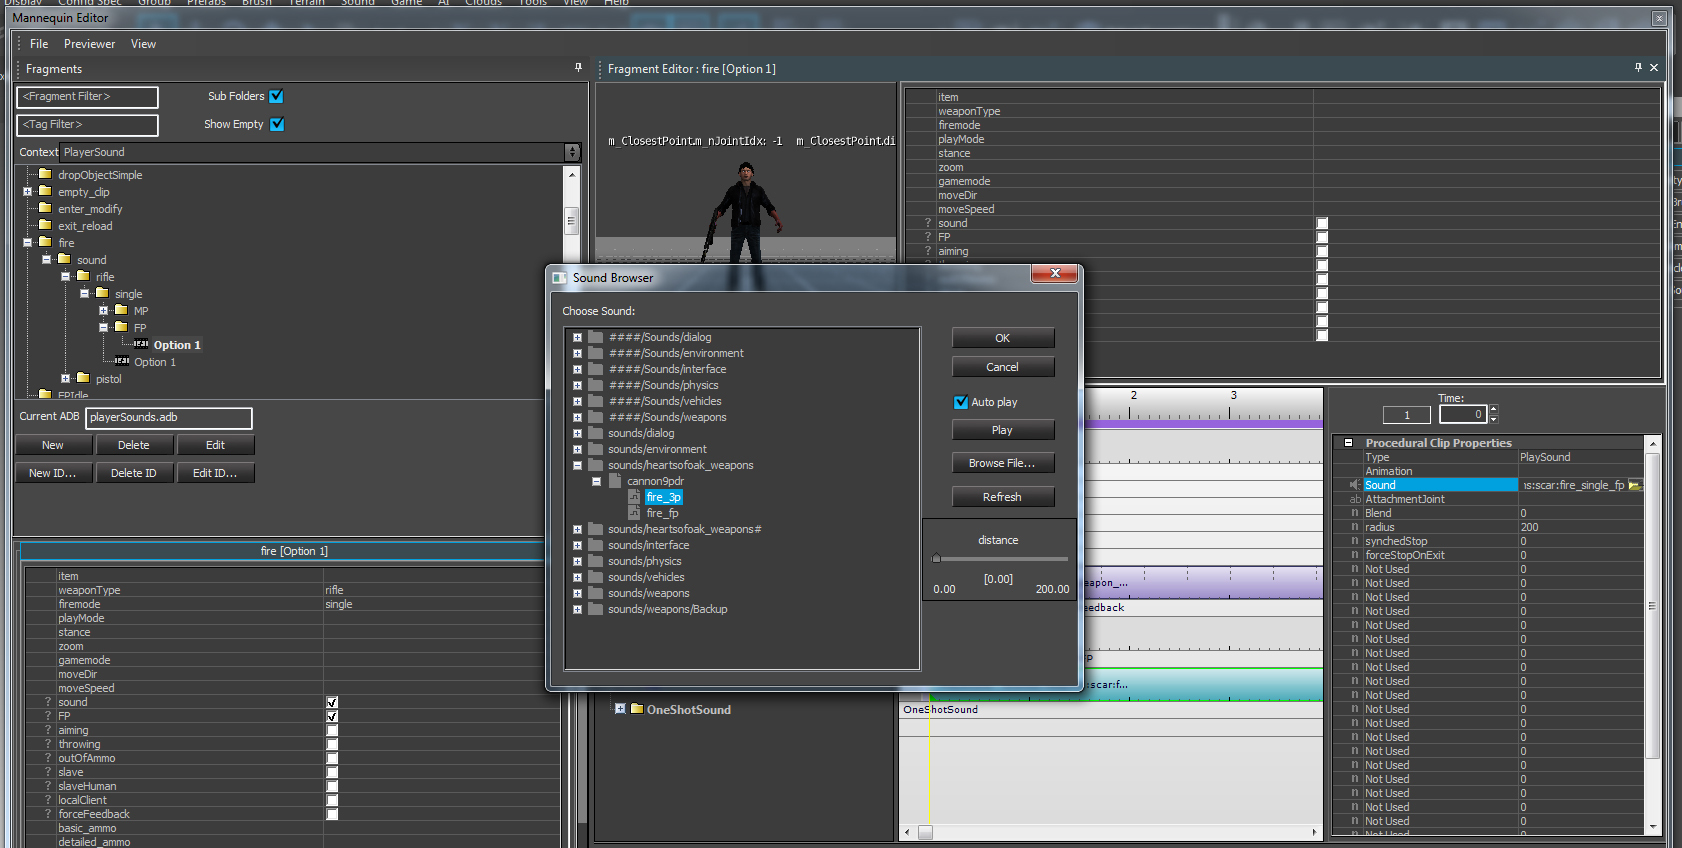
When you choice your sound it should be payer. If you have a delay then take a look of your right naming of the "AUDIOPRELOADS.XML" and its entrys.
The right setup sound you can see at "3D-Sounds" too when you see the "DISTANCE" bar below the buttons in SOUND BROWSER.
PICTURE:
When the sound plays right, you have setup with success your sound and test it Mannequin editor!
-END-
-
